

Magento 2 installation on Centos 7, VPS Server
If you are thinking of how you could install Magento 2 on Centos 7 + ISP Manager, this article is written just for you. Our Magento eCommerce agency will in detail describe how to install Magento 2.7.7. You will understand how to configure your VPS server, install the required PHP version and all necessary components for the correct operation of Magento 2.
To begin our web development journey you would need to have a paid VPS server with a pre-installed Centos 7 operating system, you also need to pay for the ISPManager license in order to use your control panel. ISPManager license is attached to your IP address and can be reinstalled an unlimited number of times. If something goes wrong you can easily start from the beginning.
Other required software:
-
vSSH
-
FileZilla
If you already have your VPS Server and paid ISPManager license then you are ready to start the server configuration and Magento 2 installation.
ISPManager installation
-
Connect to the server via SSH with superuser privileges (root by default).
-
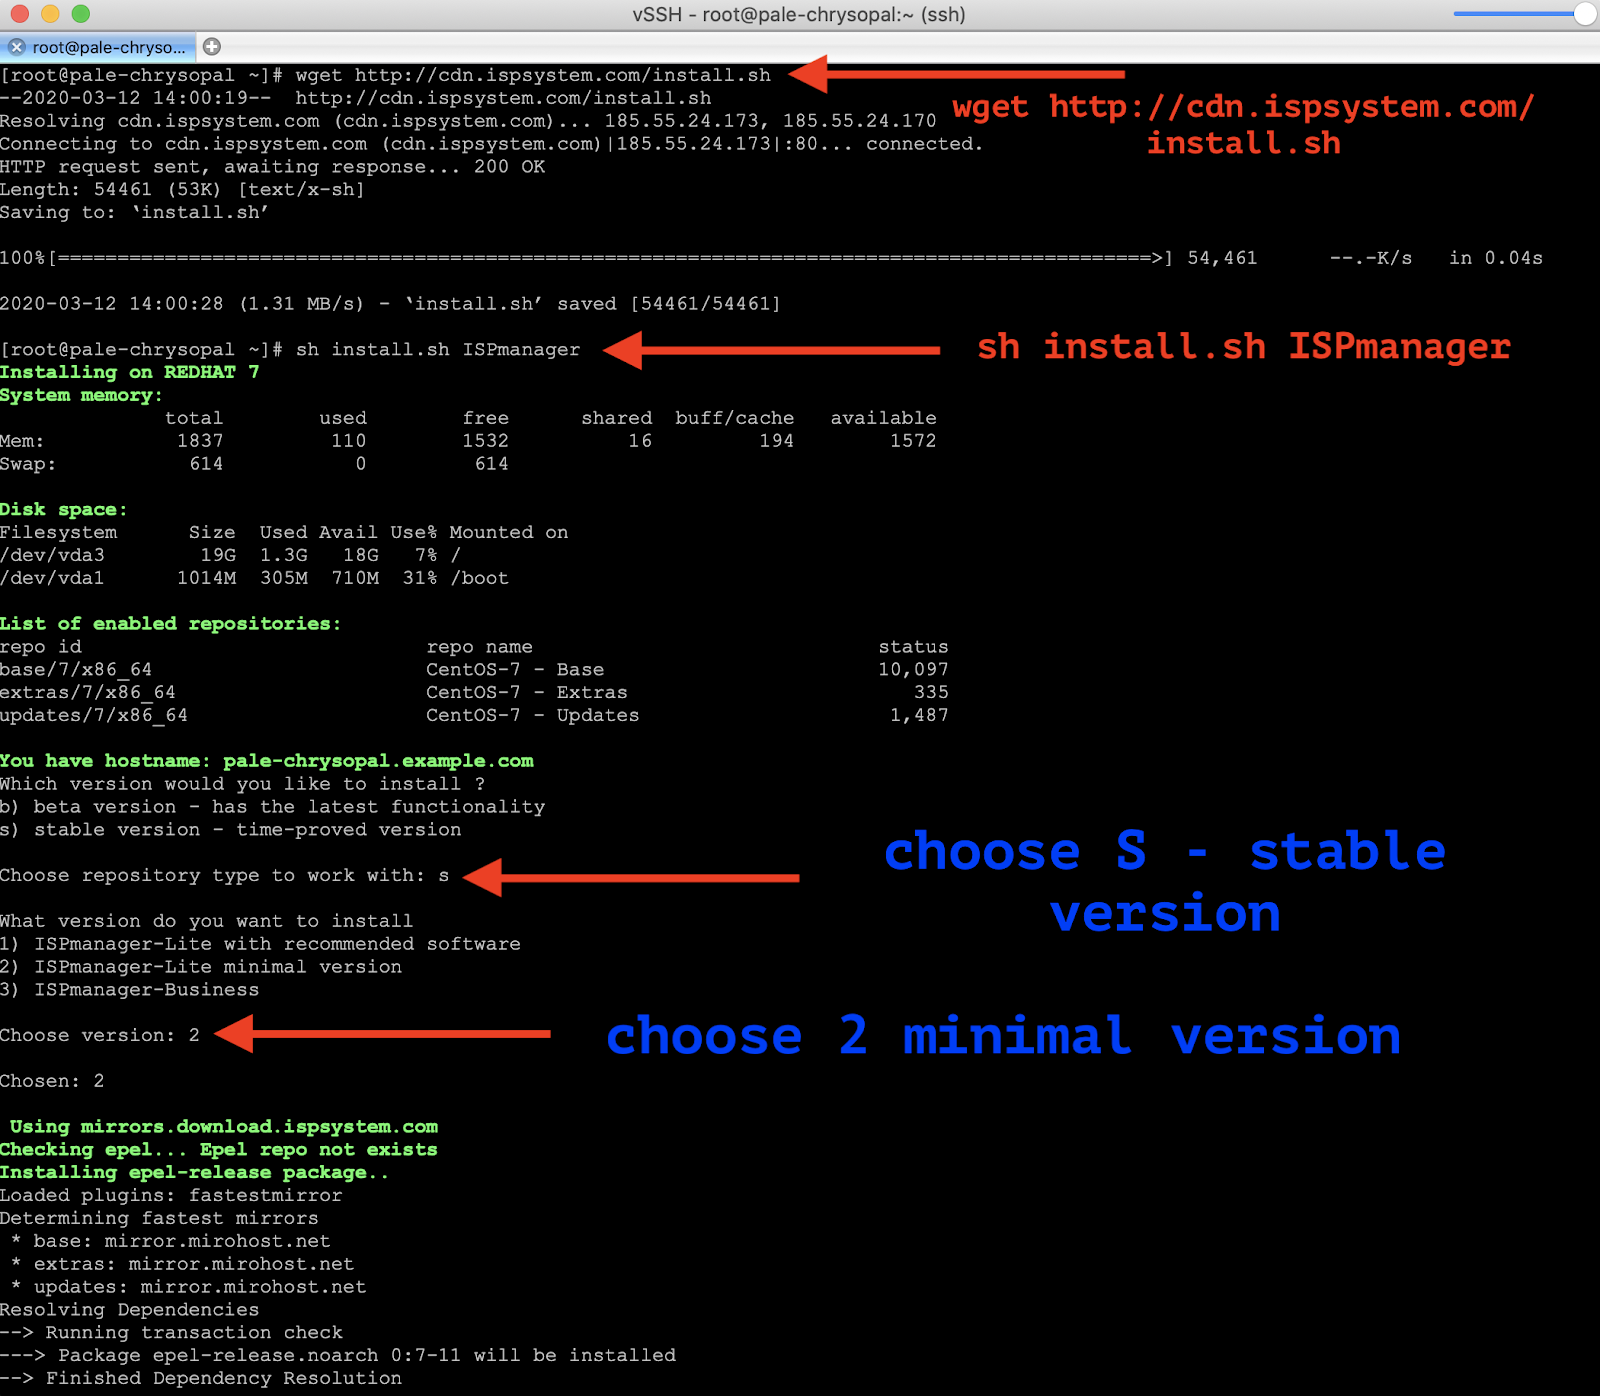
Download the installation script:
- simply run this command:
wget http://cdn.ispsystem.com/install.sh
-
Run the script: sh install.sh ISPmanager
you would need to choose stable version and ISPmanager minimal version
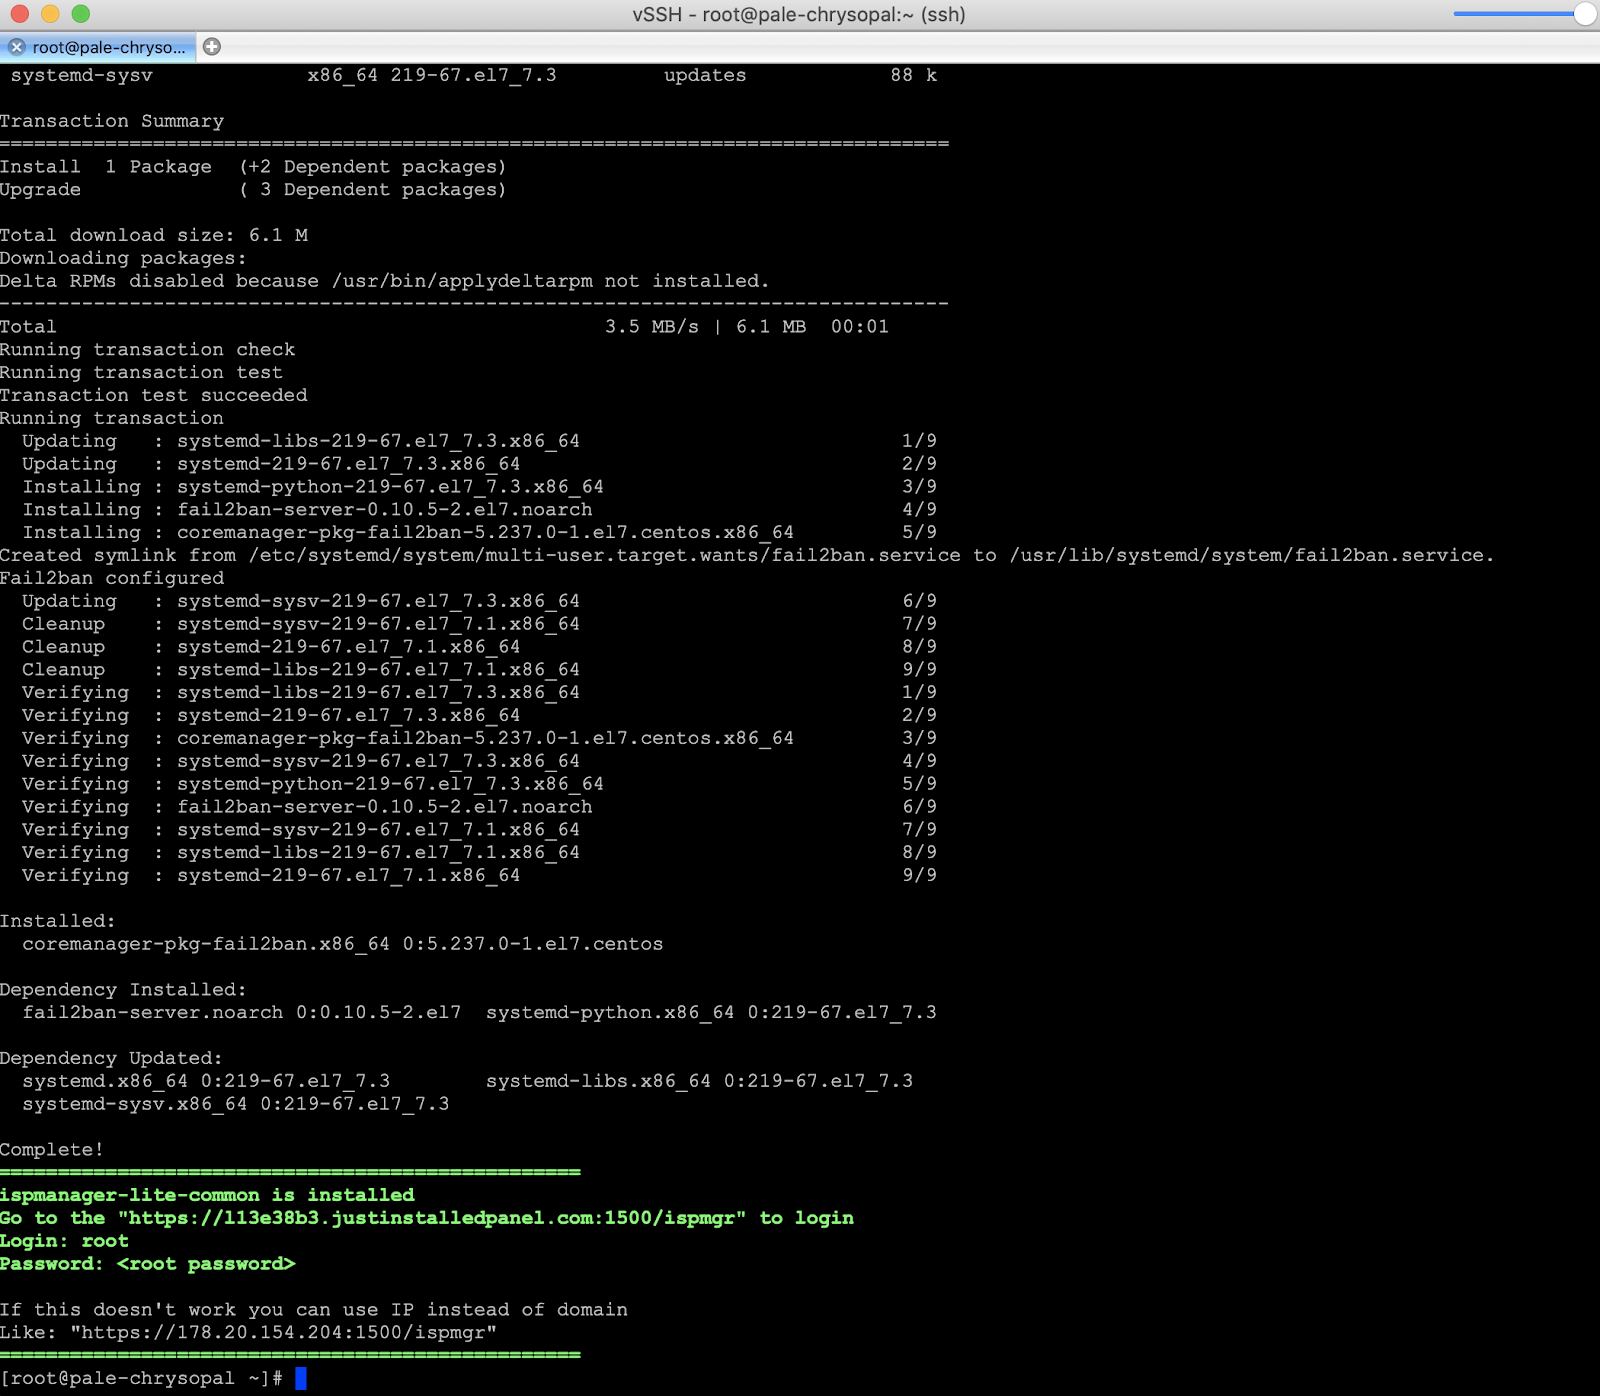
This how the end of installation message looks:
ispmanager-lite-common is installed
Go to the "https://l13e38b3.justinstalledpanel.com:1500/ispmgr" to login
Login: root
Password: <root password>
If this doesn't work you can use IP instead of domain
Like: "https://YOUR-IP-ADDRESS:1500/ispmgr"
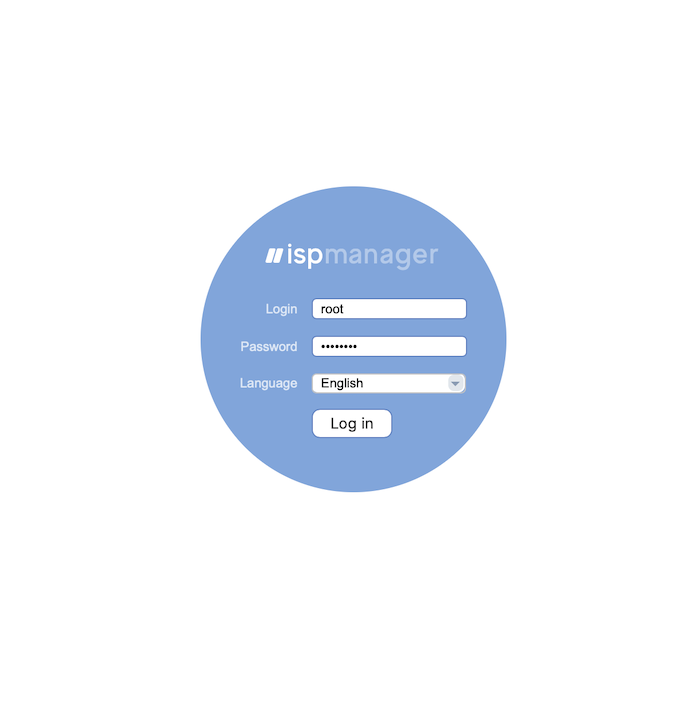
Login to your ISPManager using root login and password.
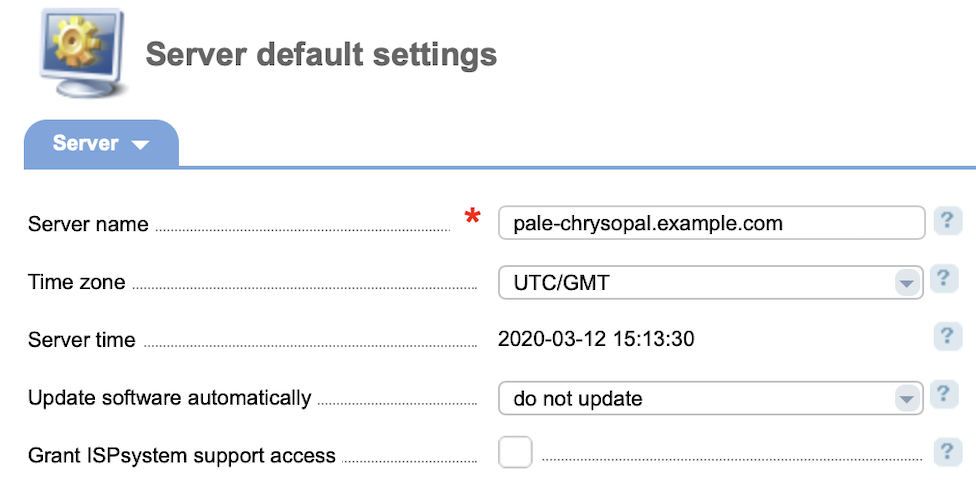
Change Update software automatically to do not update and press OK.
Installation of required PHP version
Now the experts of our Magento website agency will explain how to install the right version of PHP, create a web server and set up the necessary plugins to have a successful Magento installation.
-
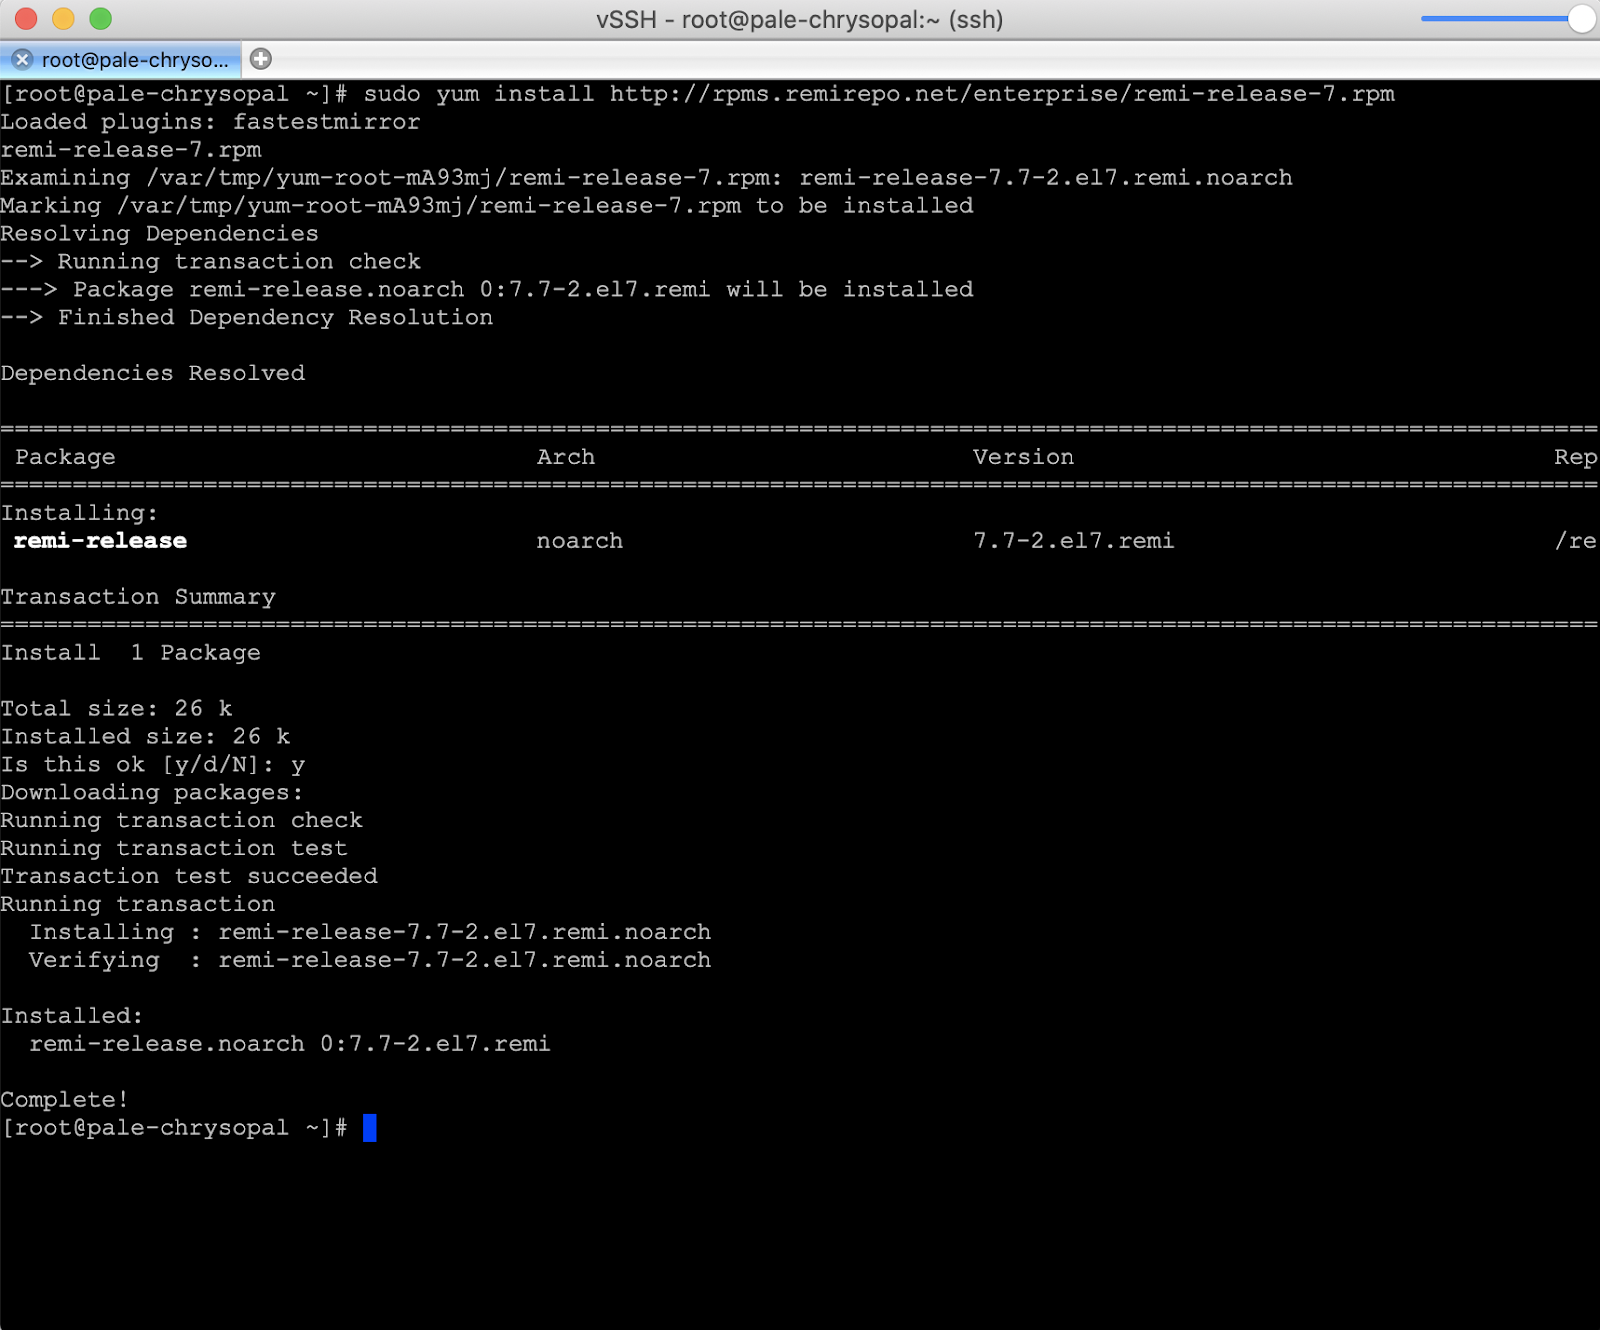
We need to install the Remy repository:
- go to your vSSH and run the following command:
sudo yum install http://rpms.remirepo.net/enterprise/remi-release-7.rpm
-
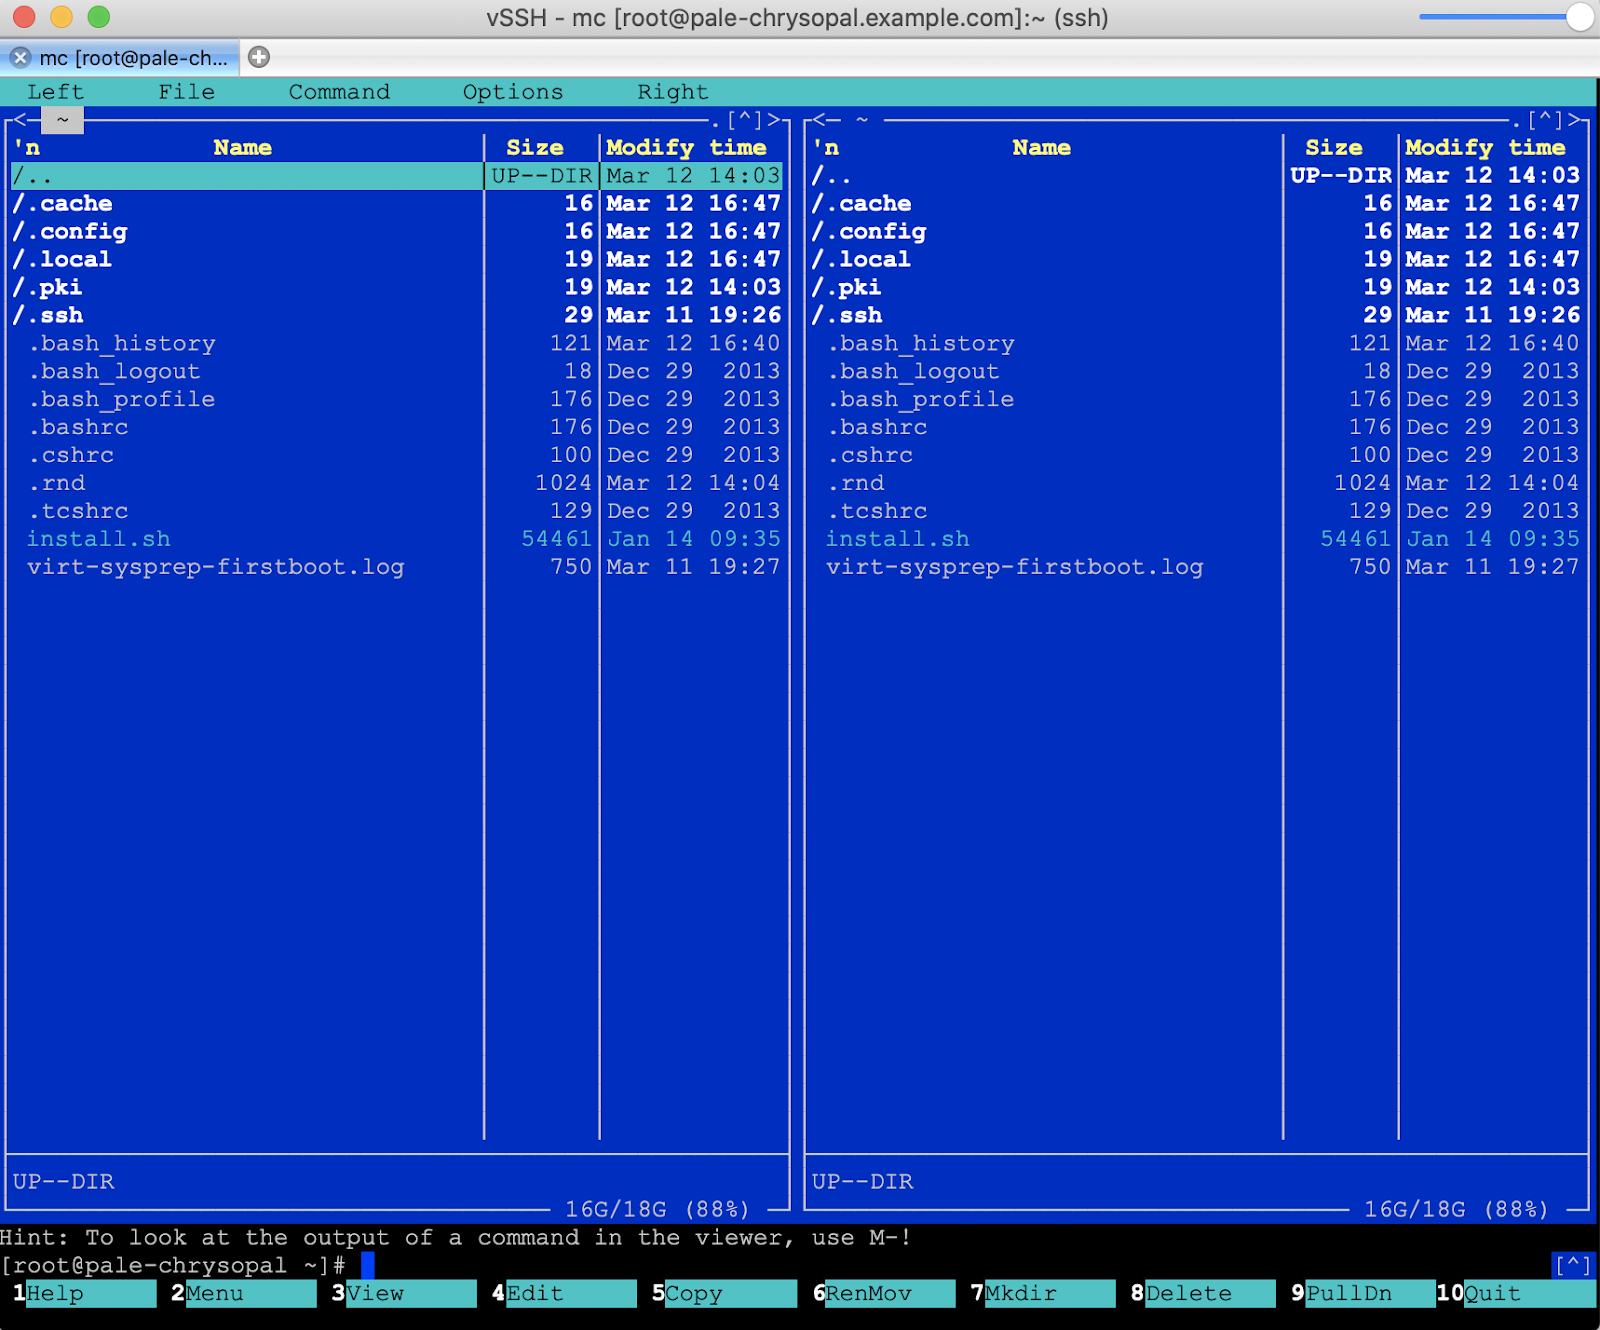
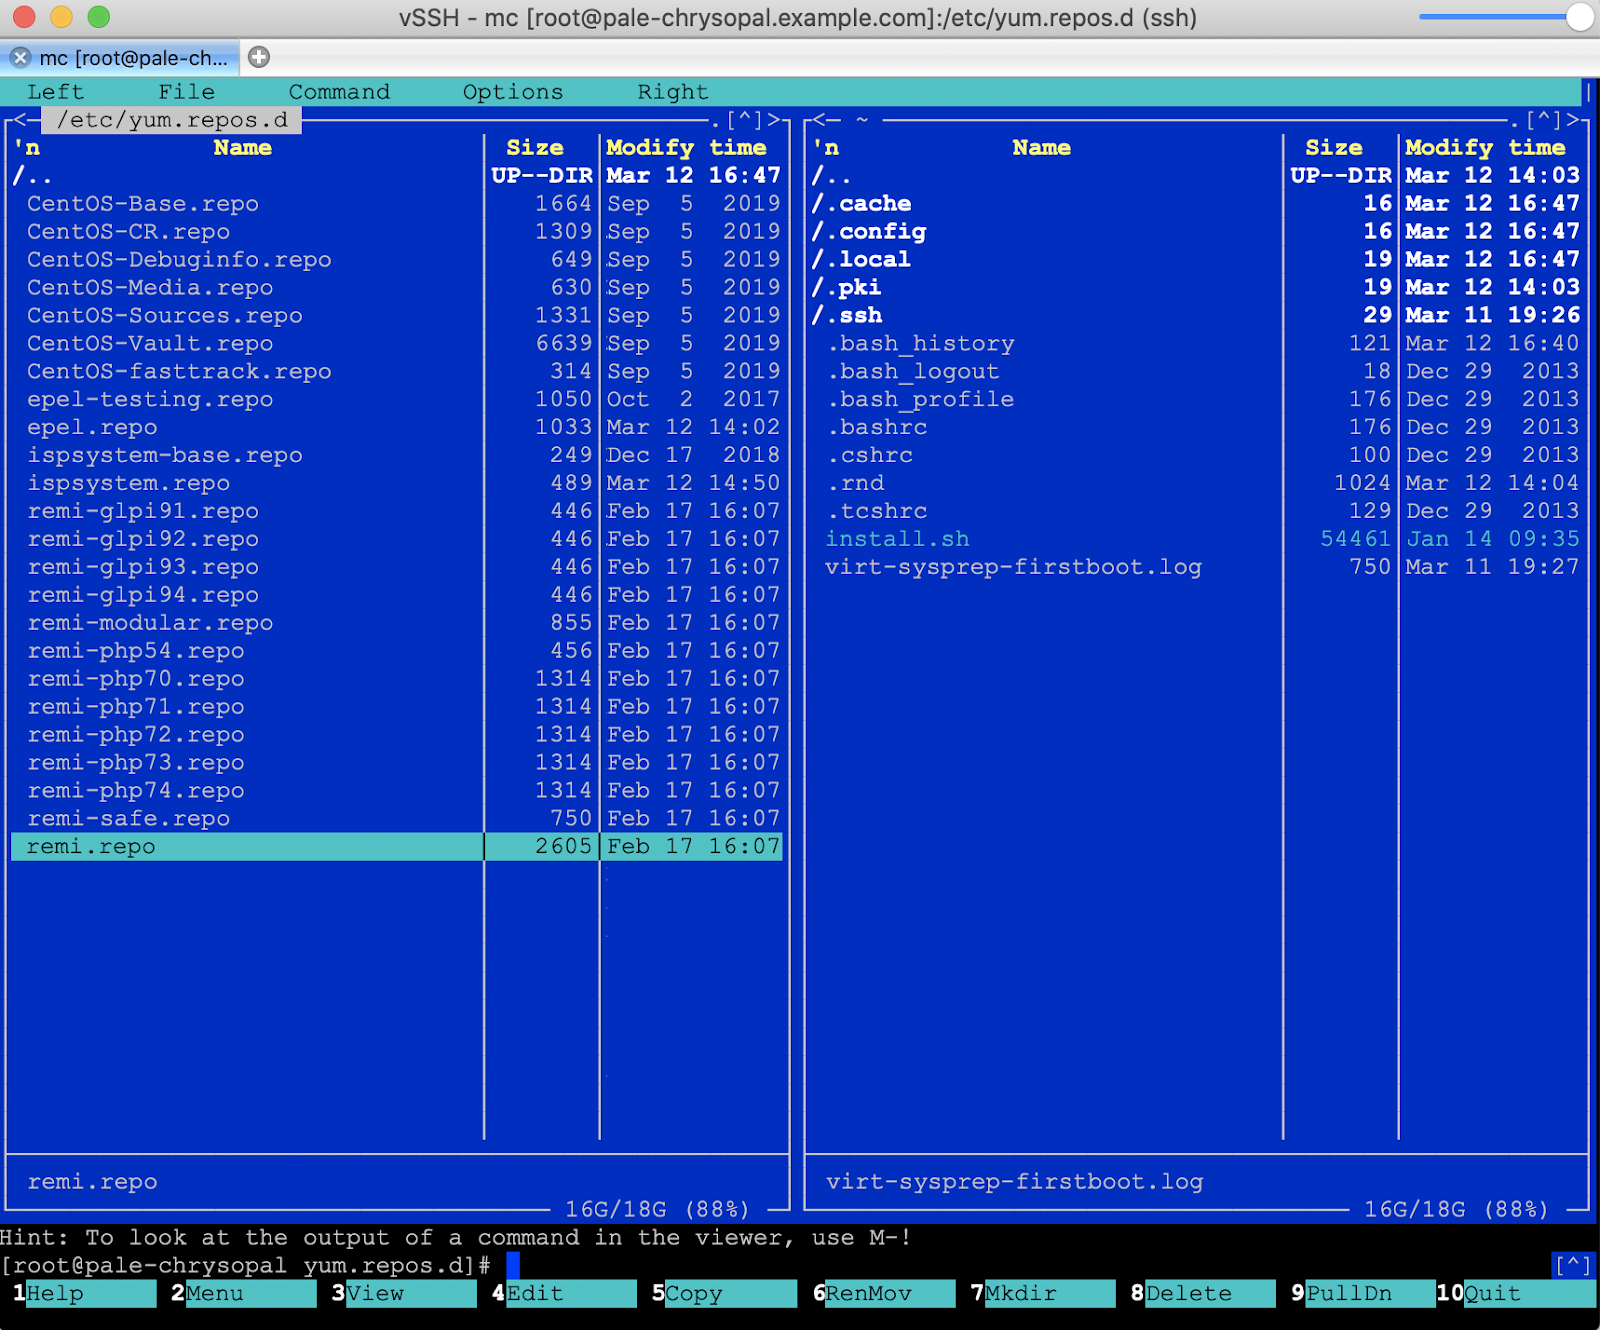
Open the Midnight Commander program:
-
run the following command - mc
-
if the Midnight Commander is not installed - install it with the command:
yum install mc and then again run command - mc
-
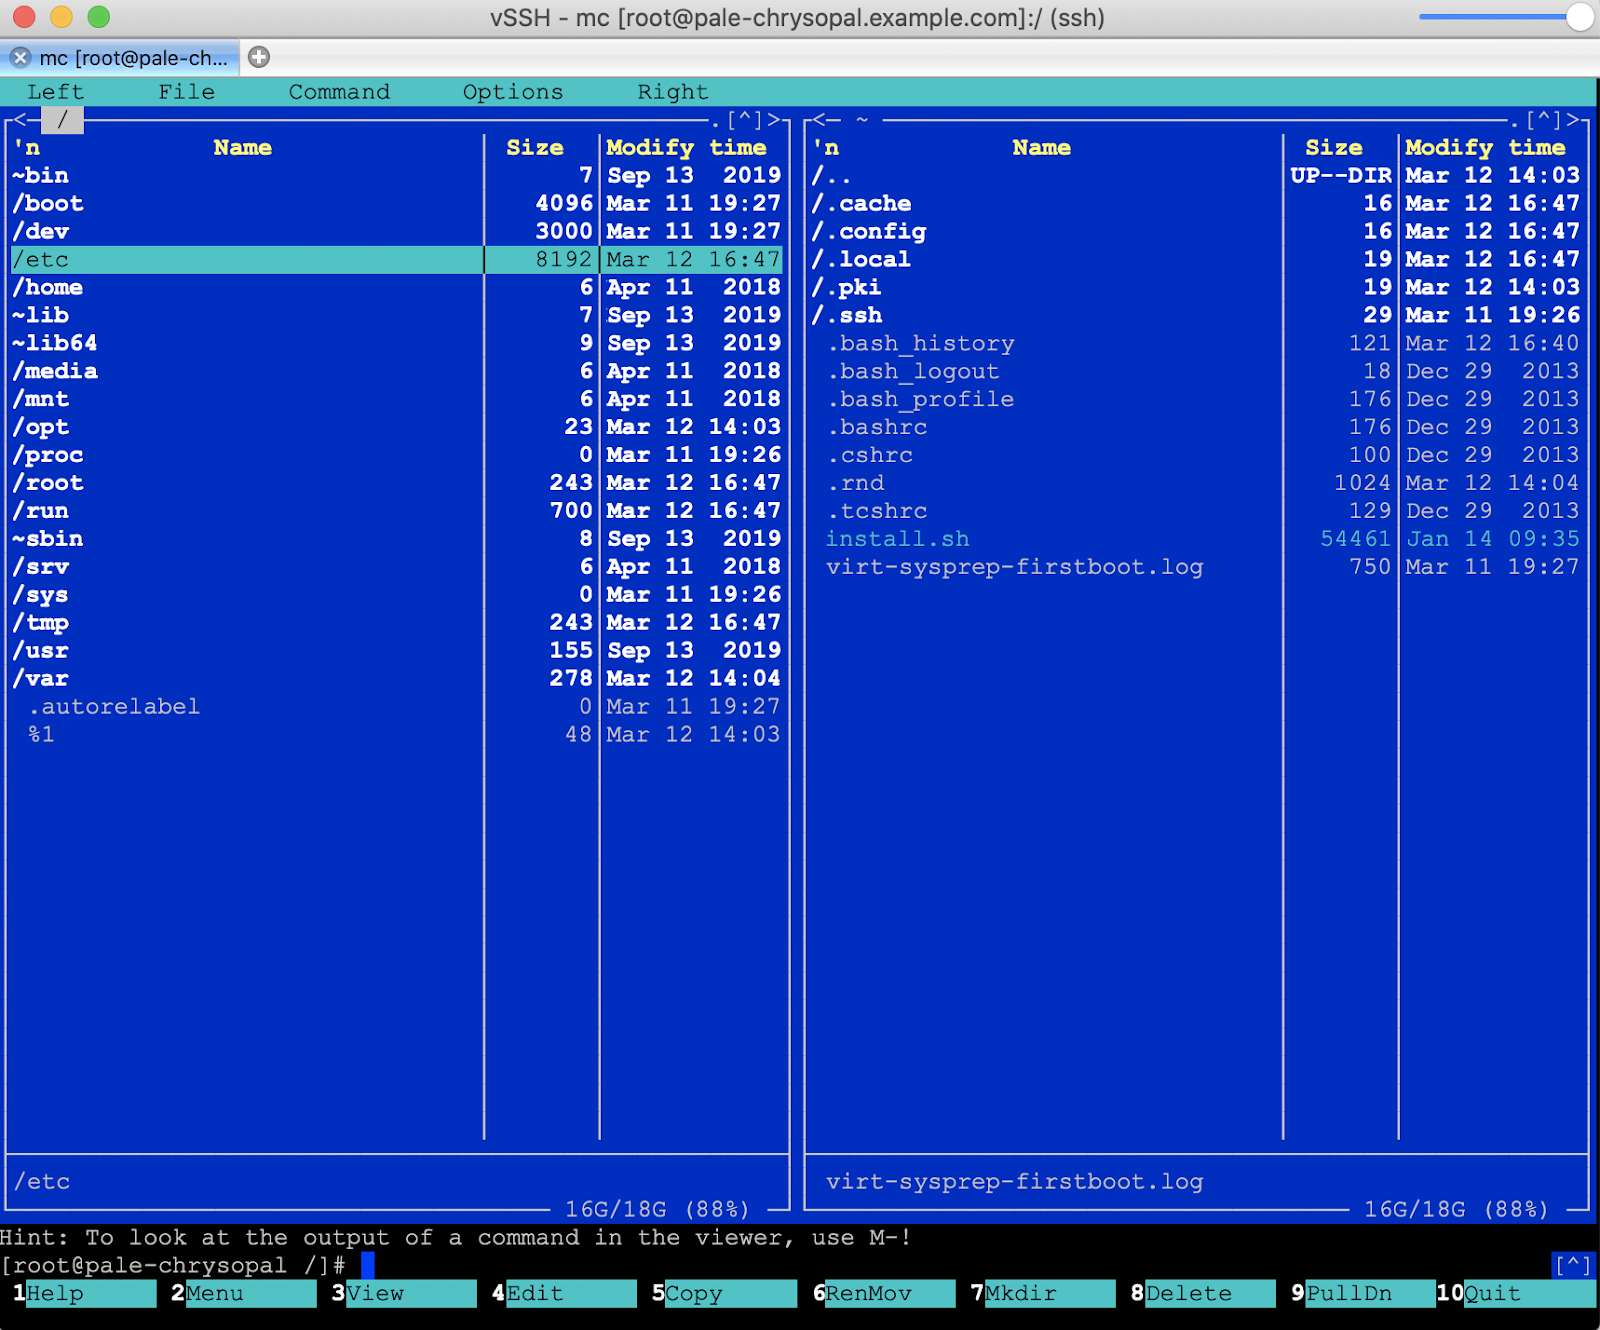
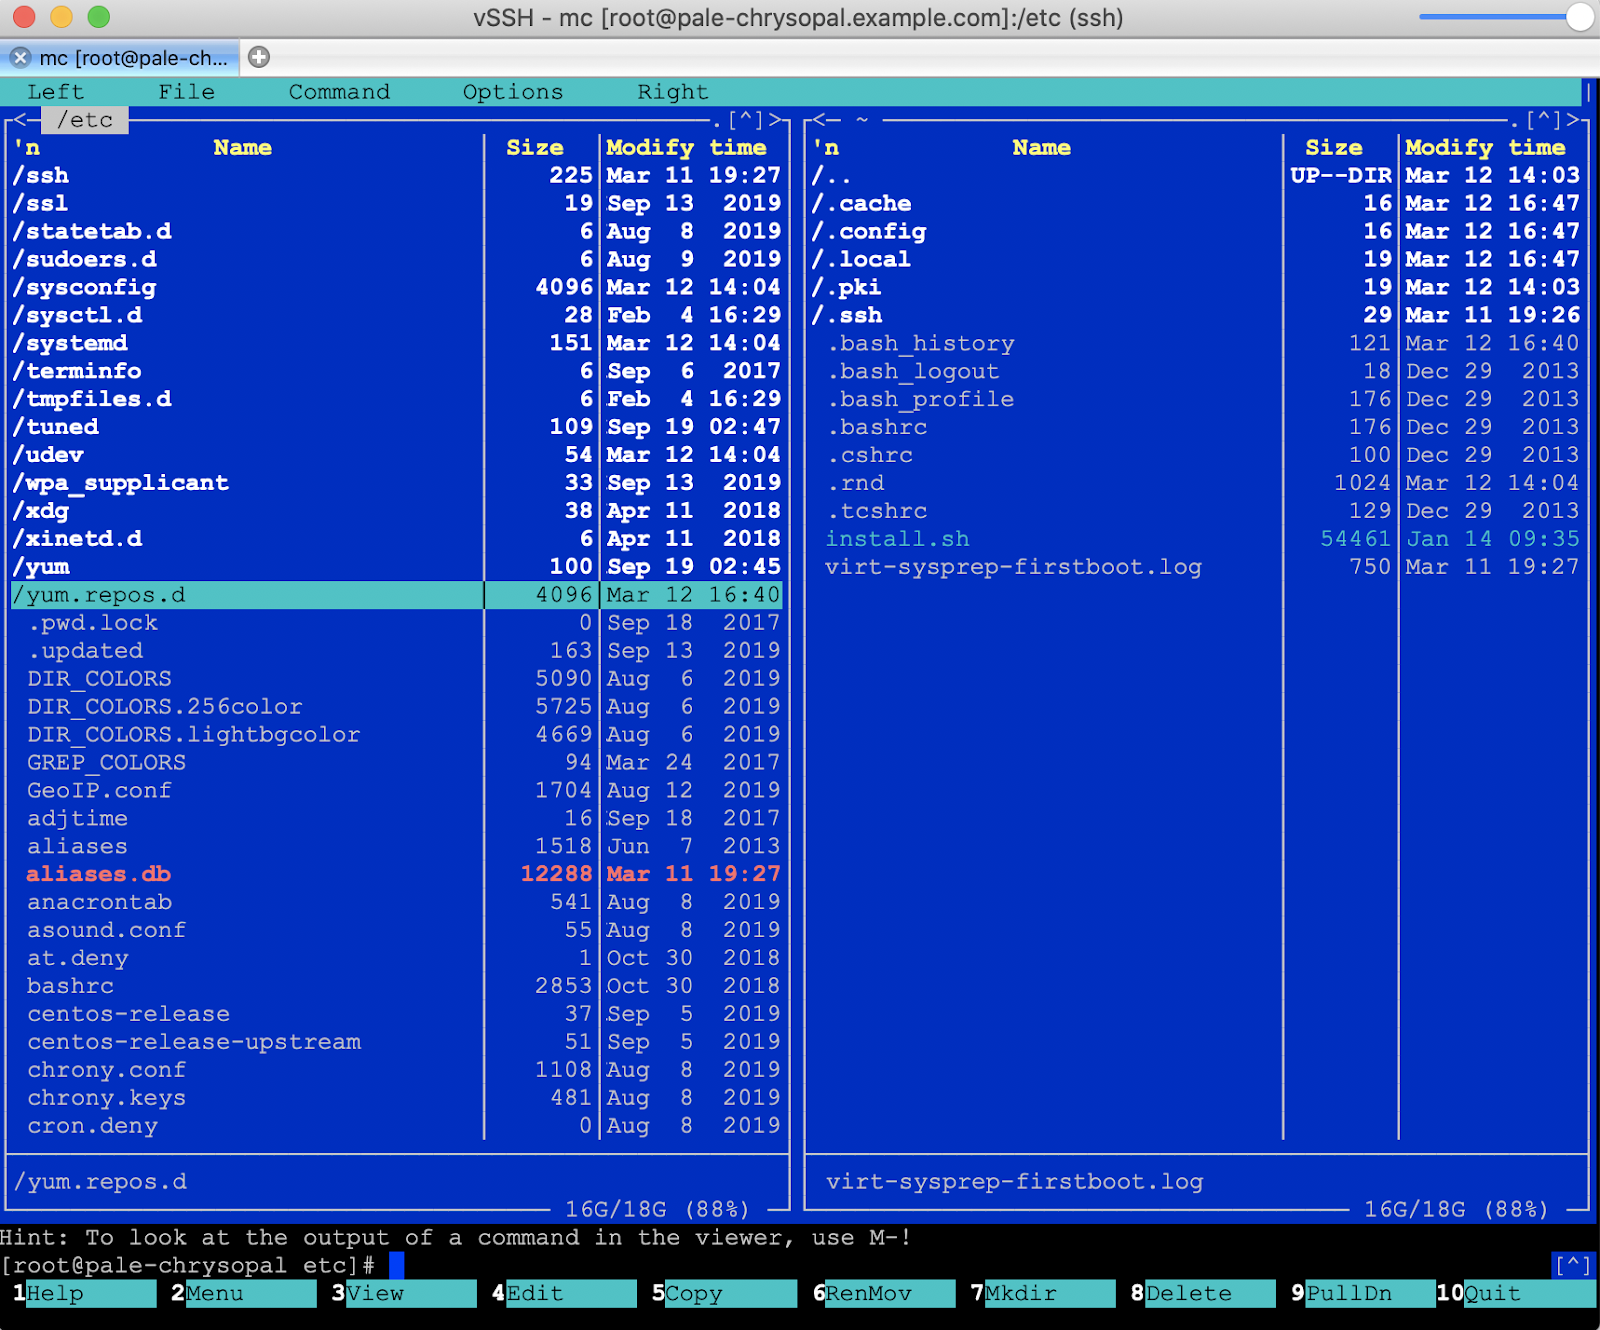
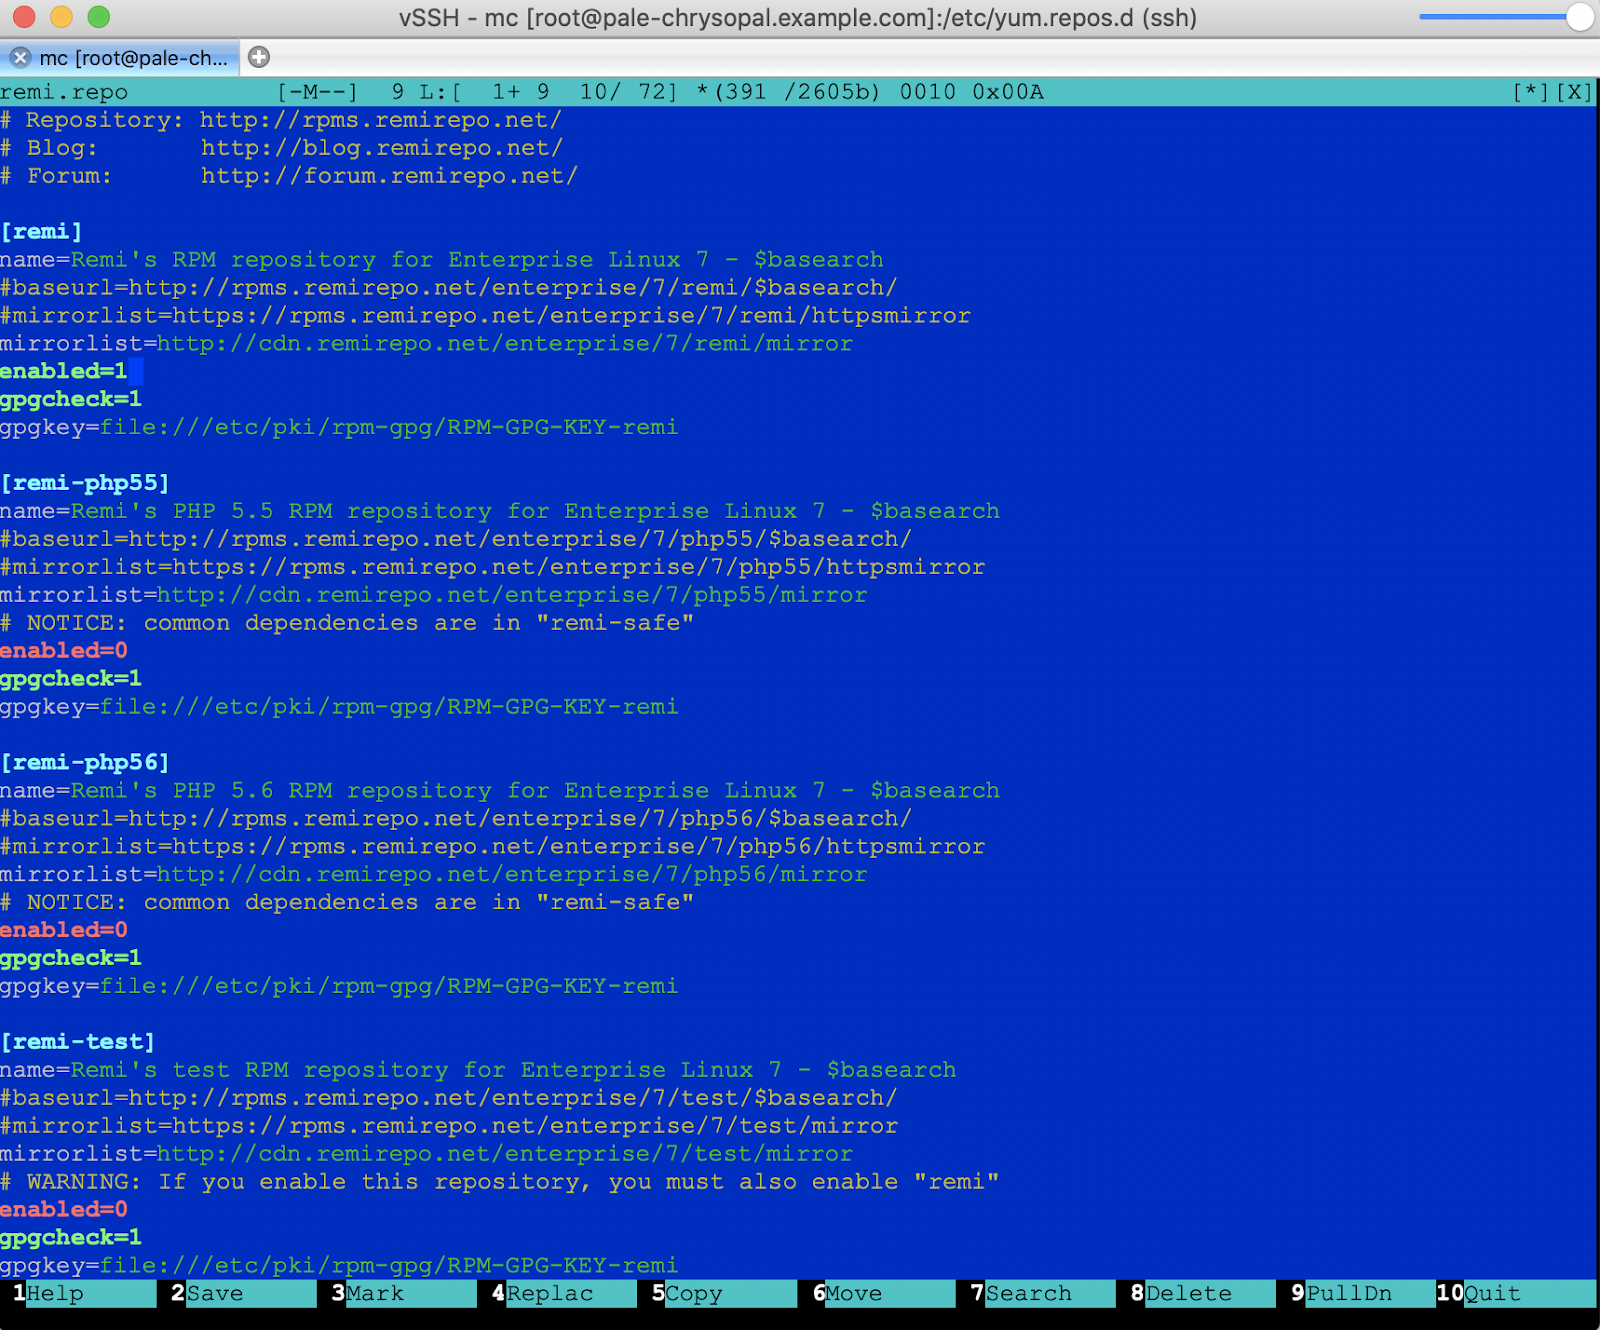
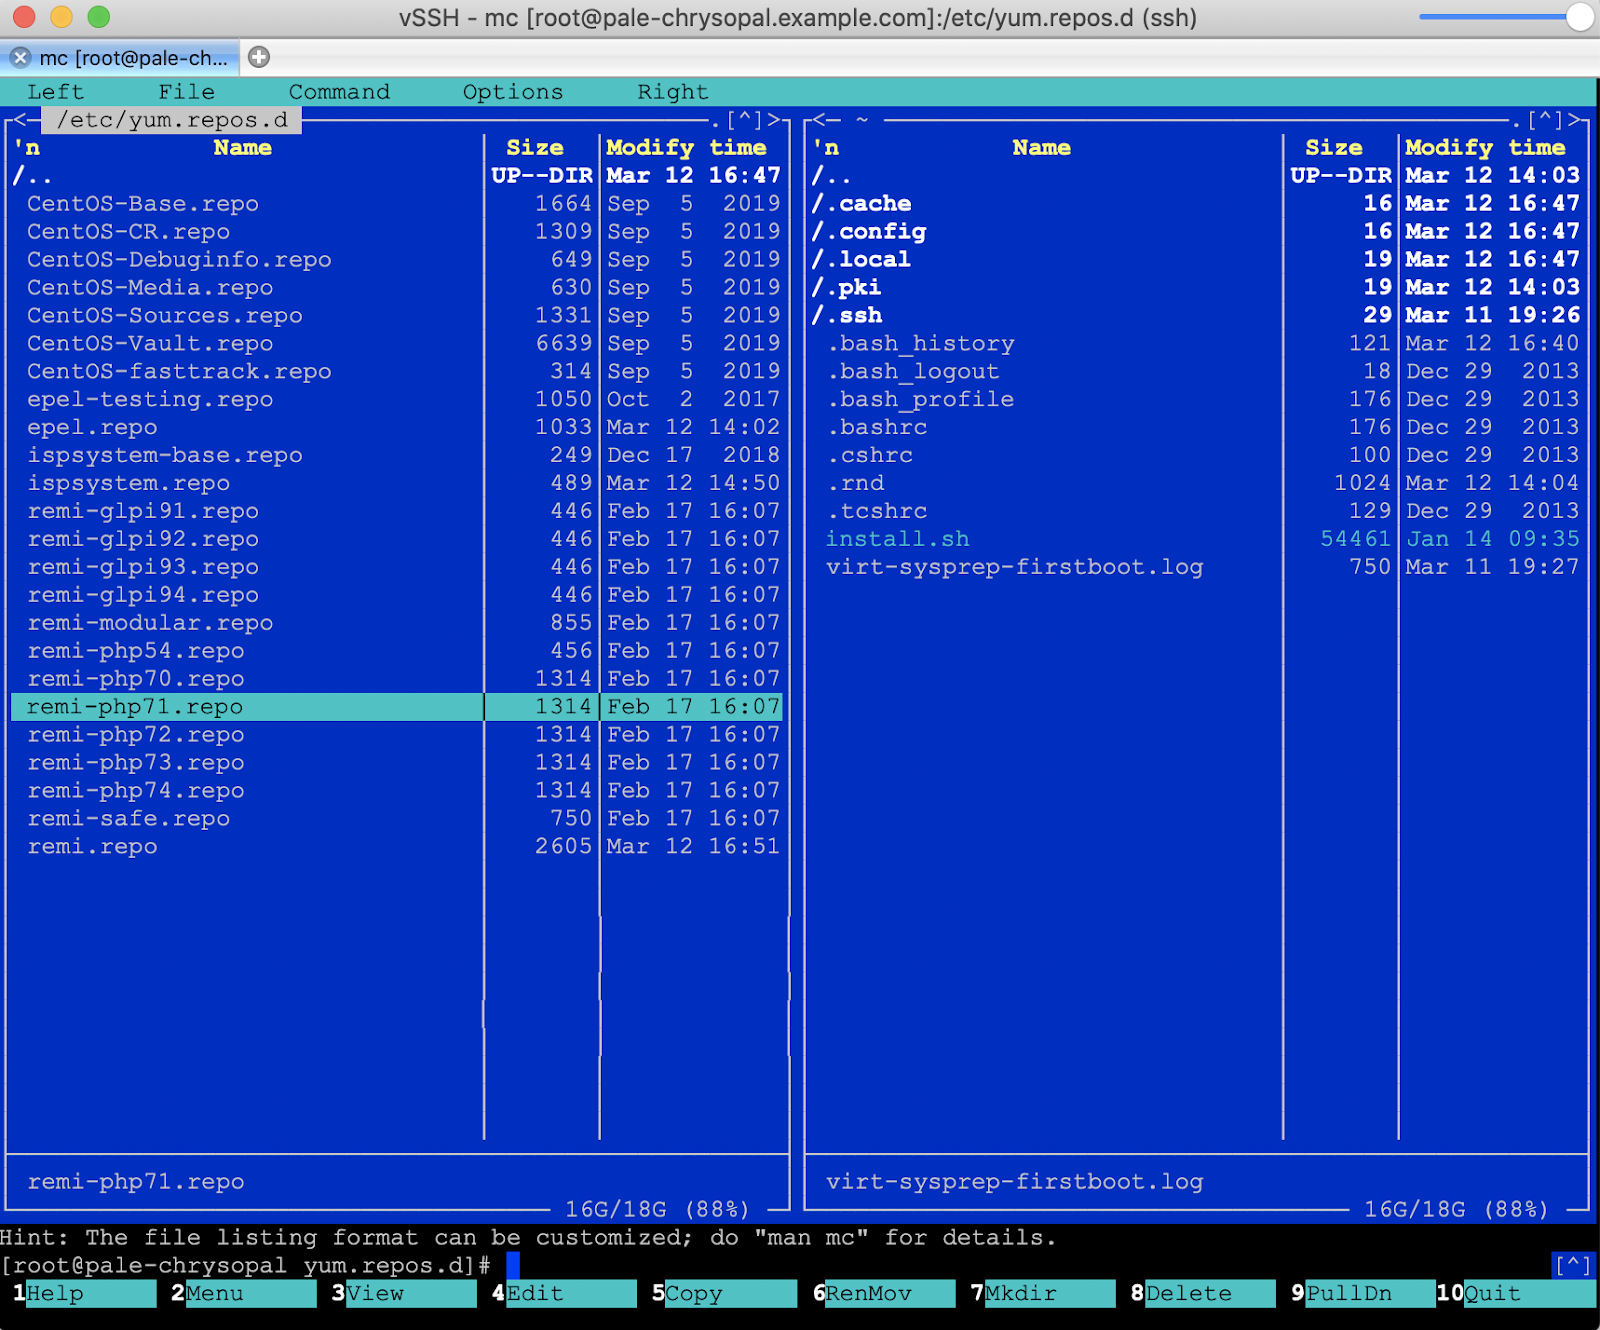
After the MC is opened press “enter” to go back from this folder; choose /etc press enter, now go all the way down and find /yum.repos.d folder and press enter; in this folder you will see two files: remi.repo & remi-php71.repo, you would need to edit both of this file. In the file remi.repo at the [remi] section change enable=0, to enable=1, save the file and quit it. Do the same with the file remi-php71.repo and in first section [remi-php71], enabled=1.
This is what it looks like:

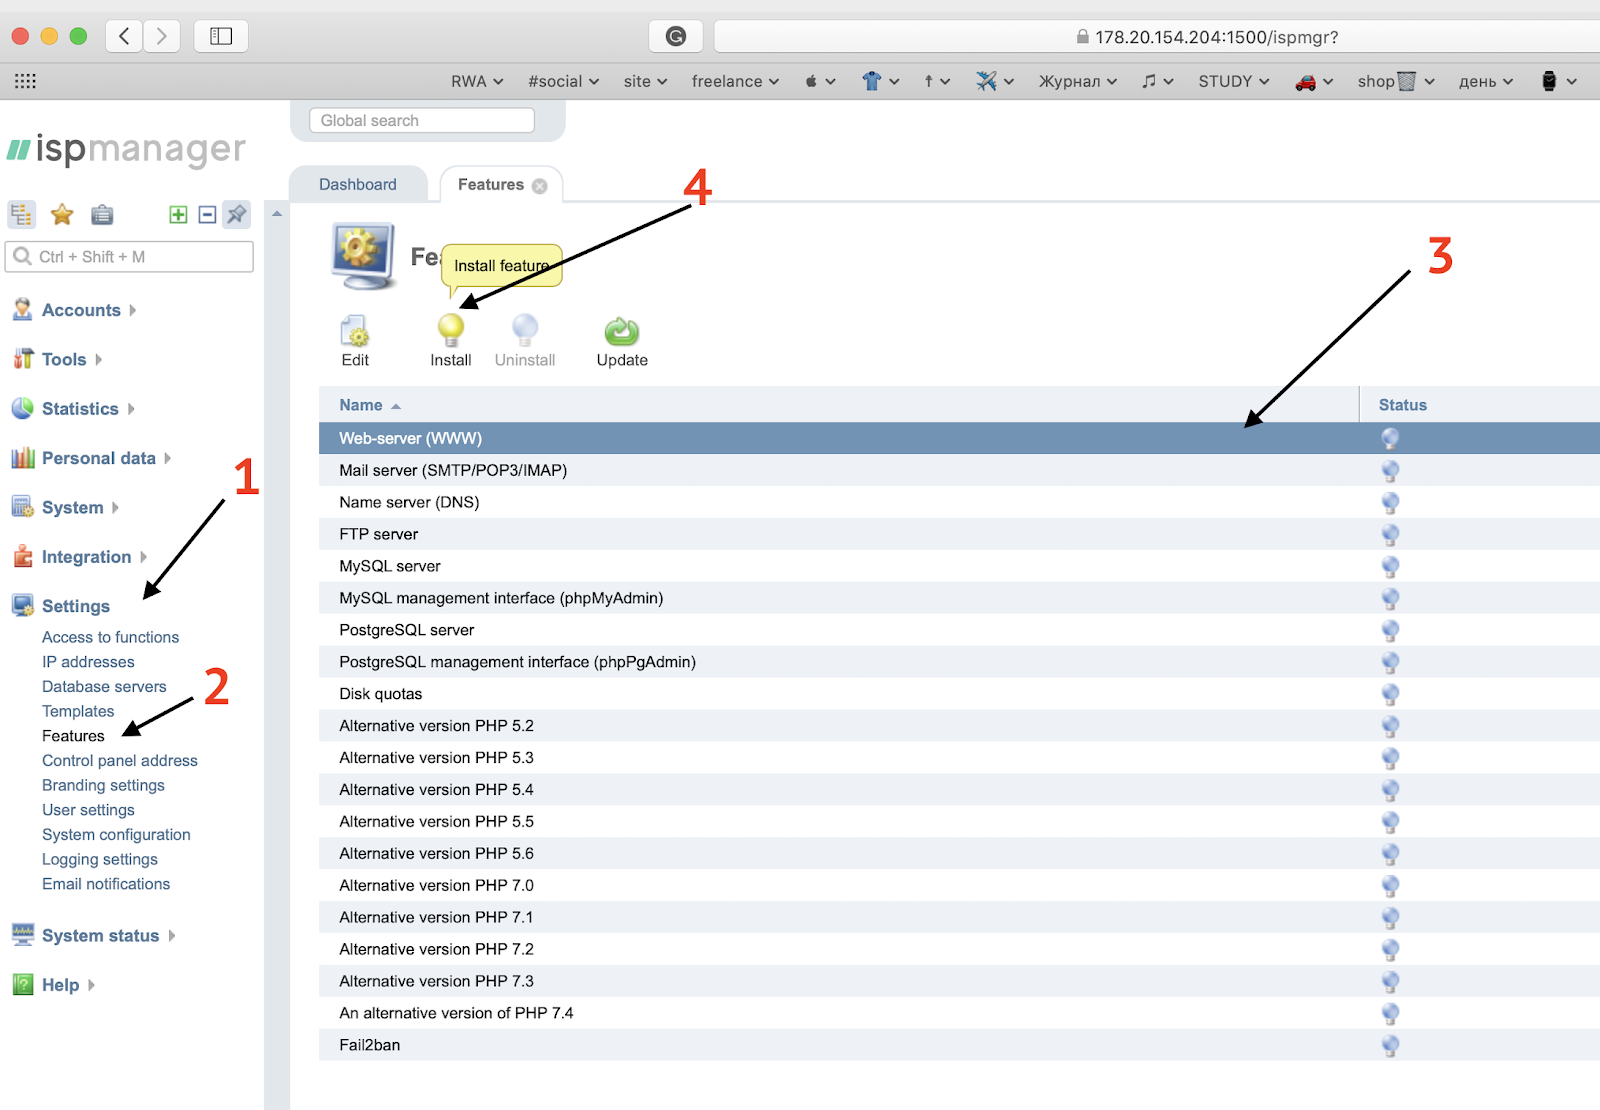
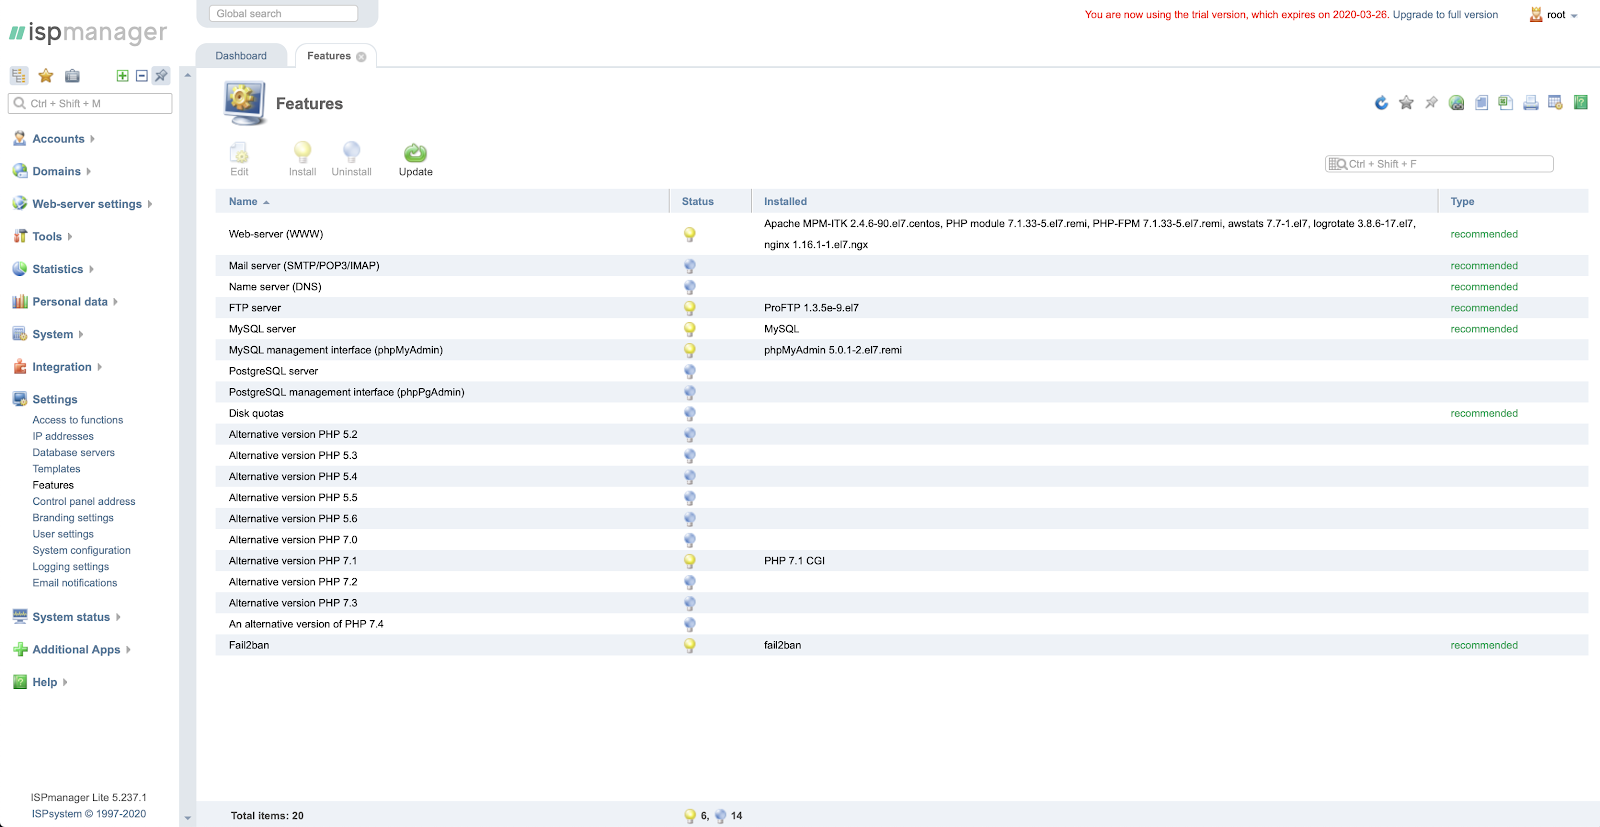
Now go to the previously installed ISPManager and open the side menu Settings - Features and install the Web server (WWW).
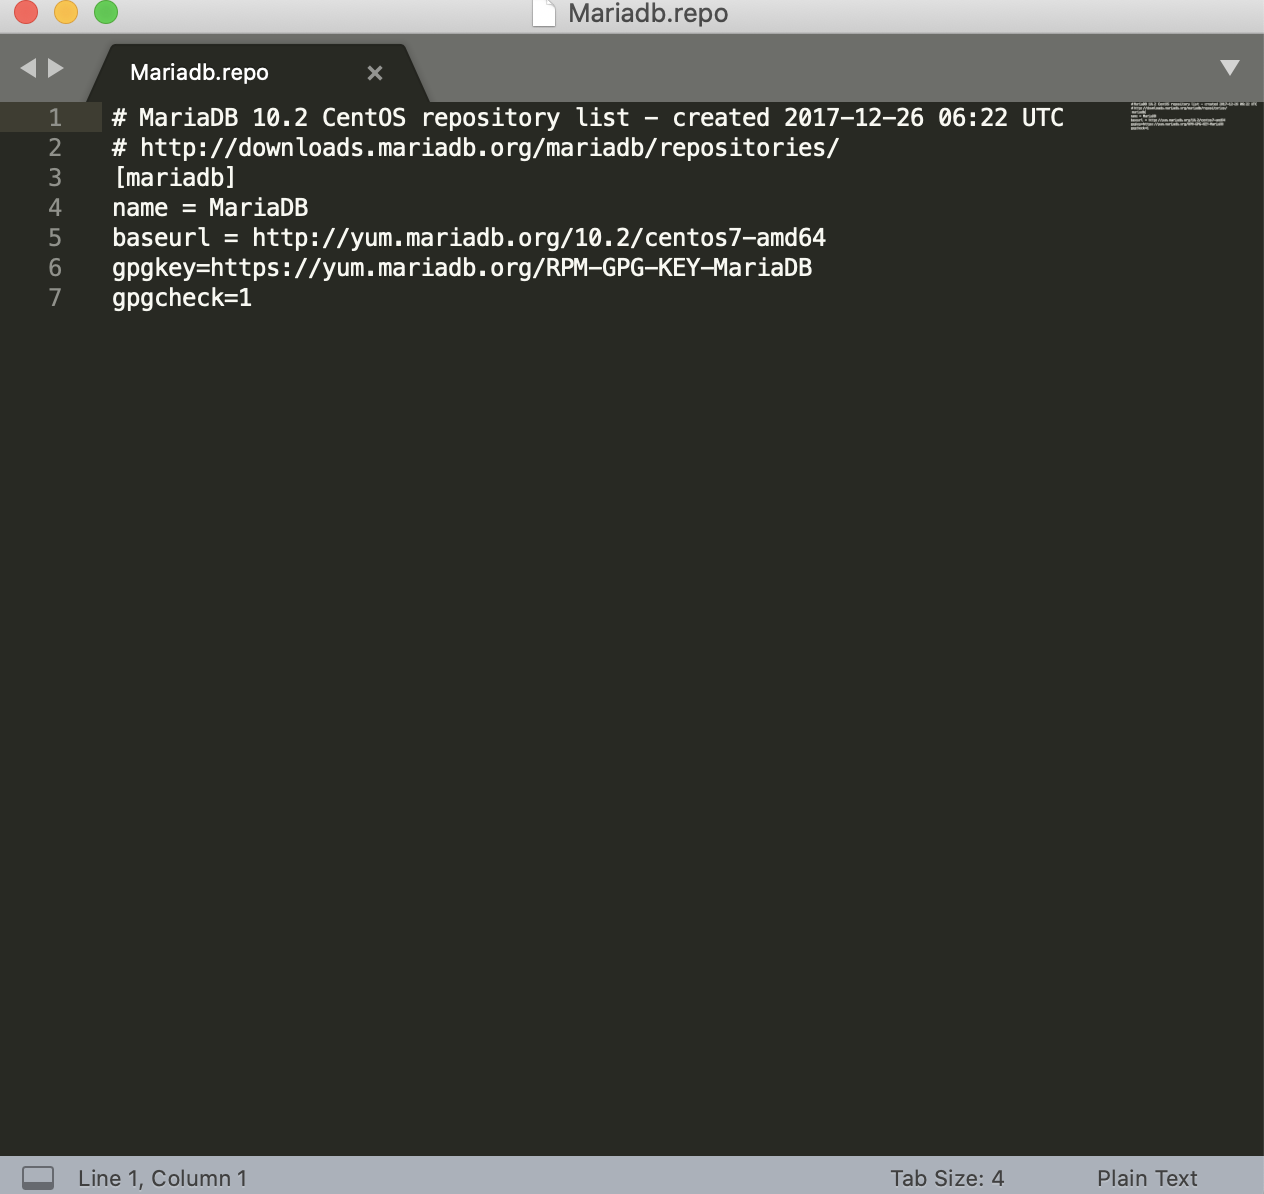
While you running the installation of the web server let's prepare Mariadb.repo file with the following content:
# MariaDB 10.2 CentOS repository list - created 2017-12-26 06:22 UTC# http://downloads.mariadb.org/mariadb/repositories/
[mariadb]
name = MariaDB
baseurl = http://yum.mariadb.org/10.2/centos7-amd64
gpgkey=https://yum.mariadb.org/RPM-GPG-KEY-MariaDB
gpgcheck=1
Our programmers using Sublime Text to create Mariadb.repo file, alternatively you can use standard Text editor, than rename it to Mariadb.repo.

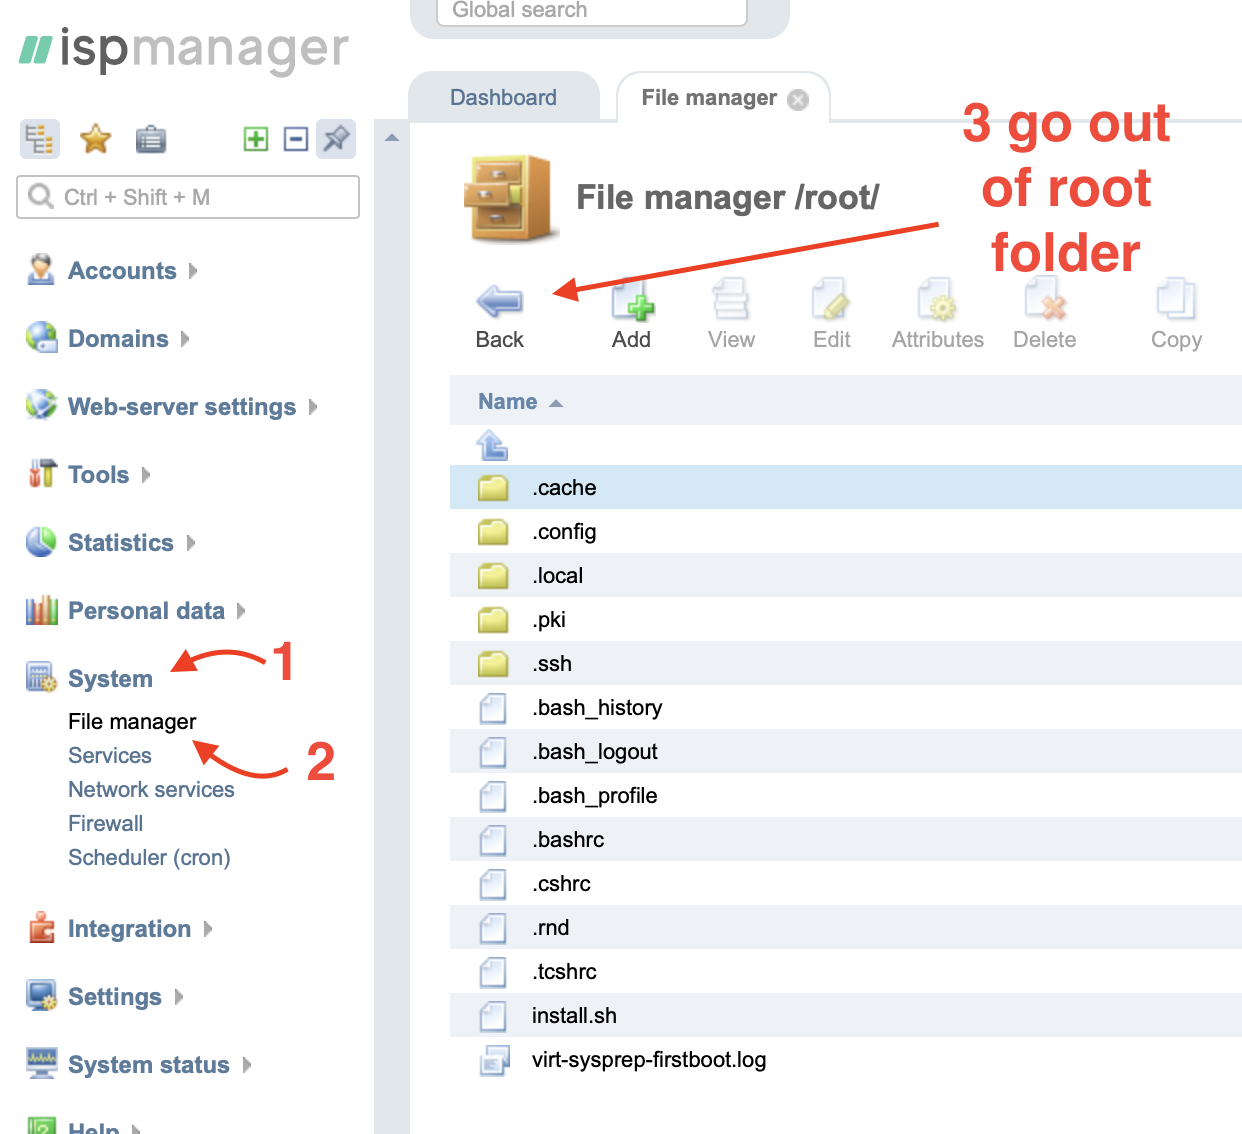
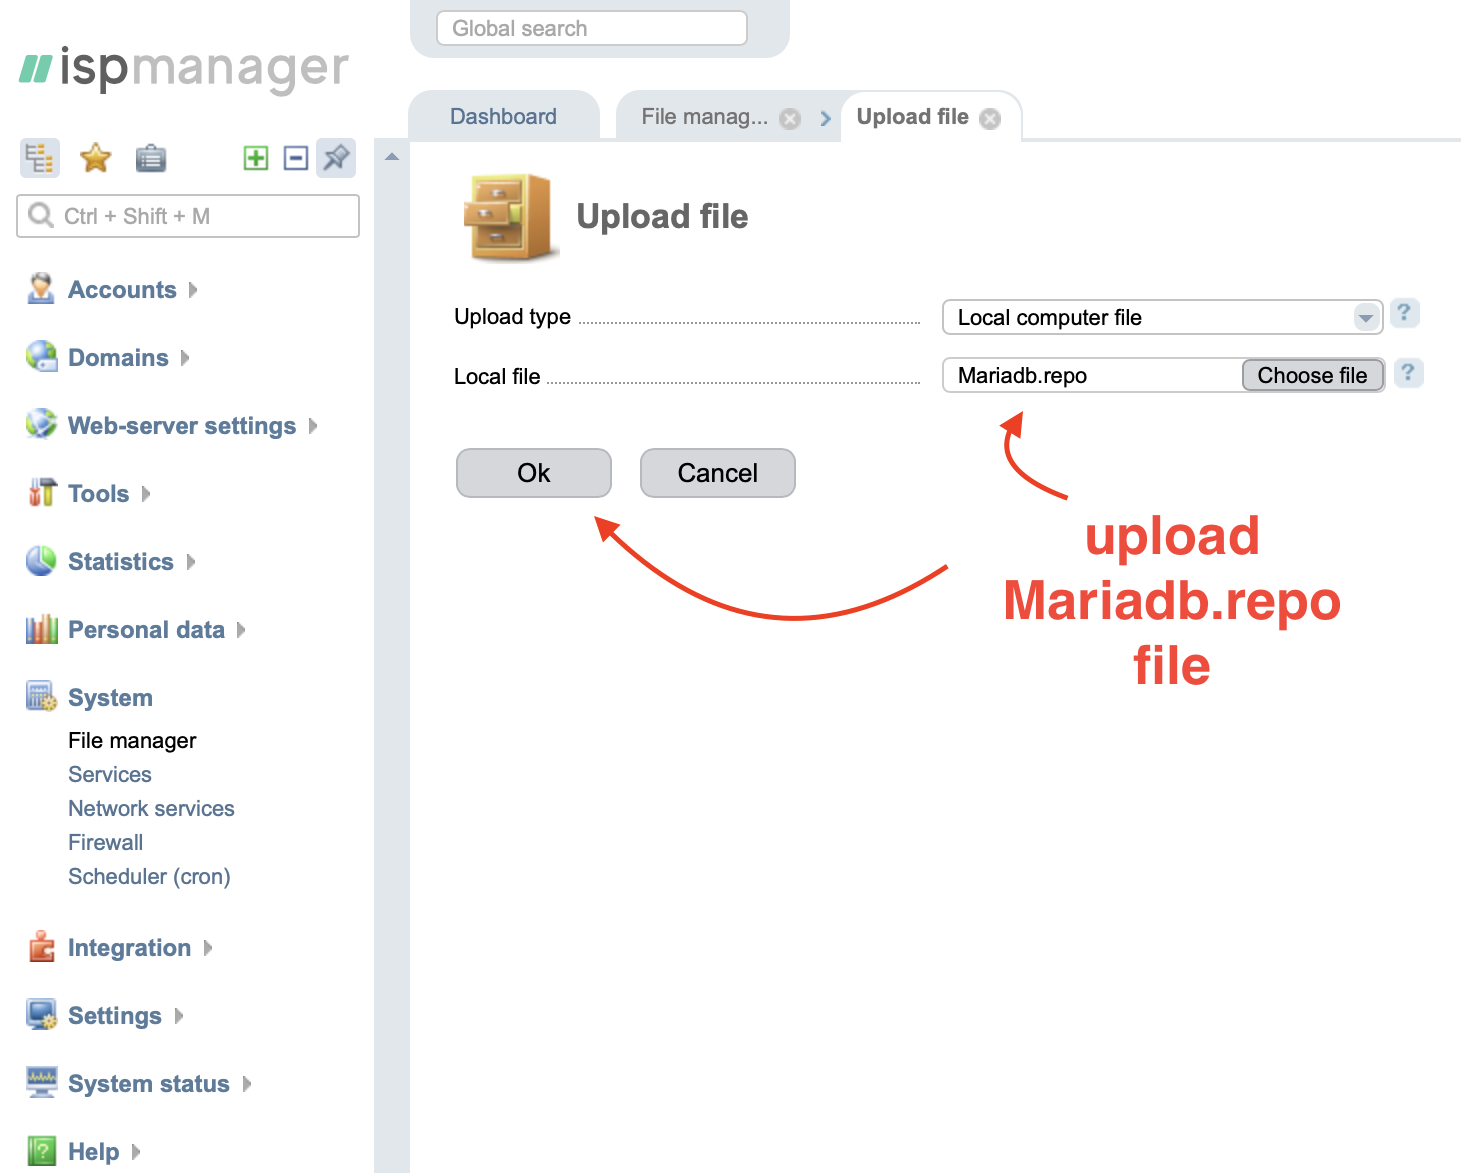
After the web server installation is finished, in your ISPManager panel go to System; File manager, press “back” to step out of /root/ folder to main File manager / folder.
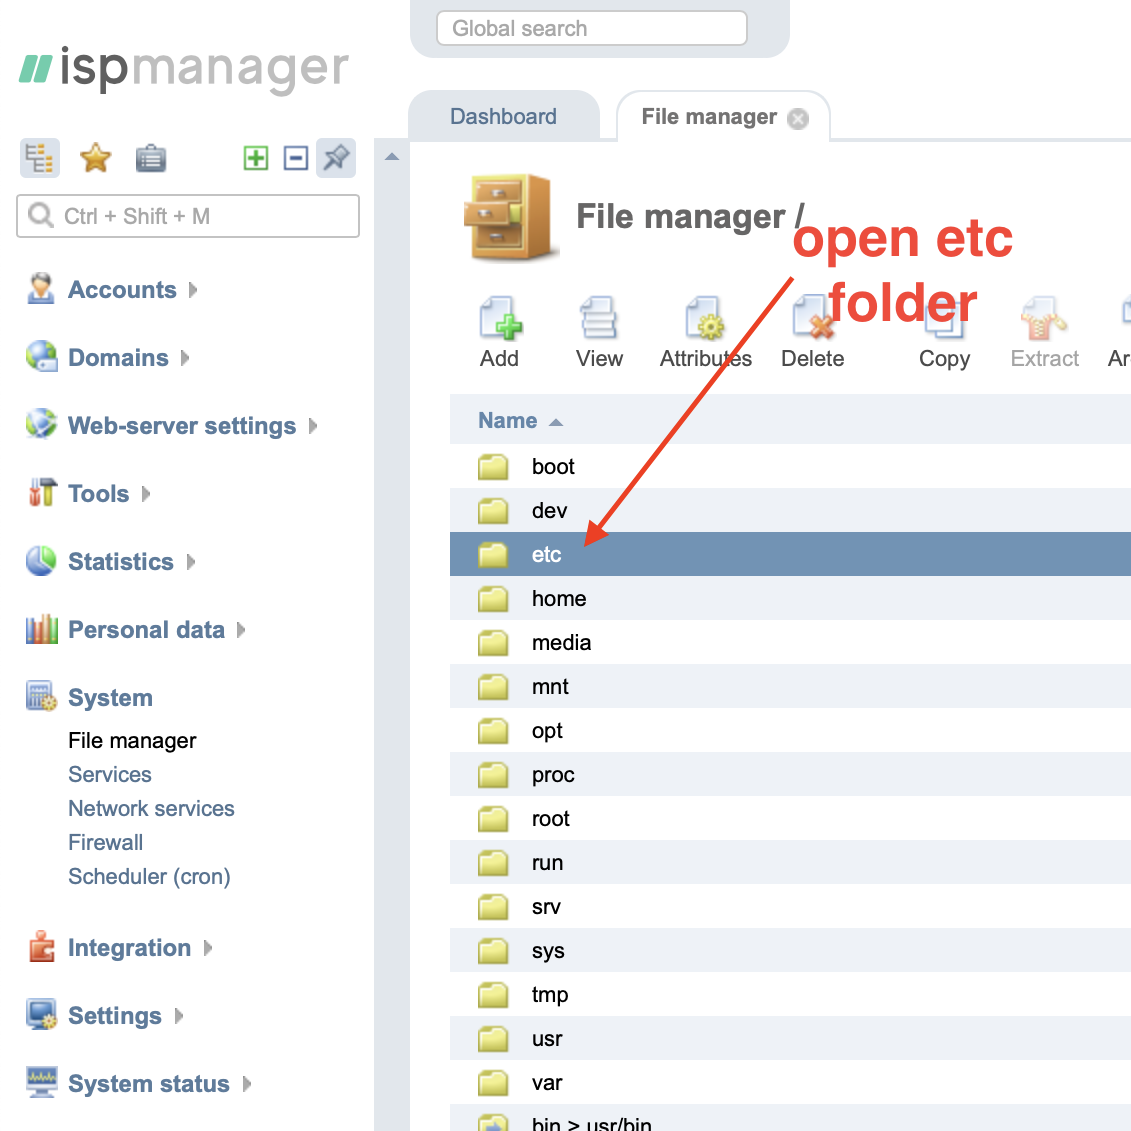
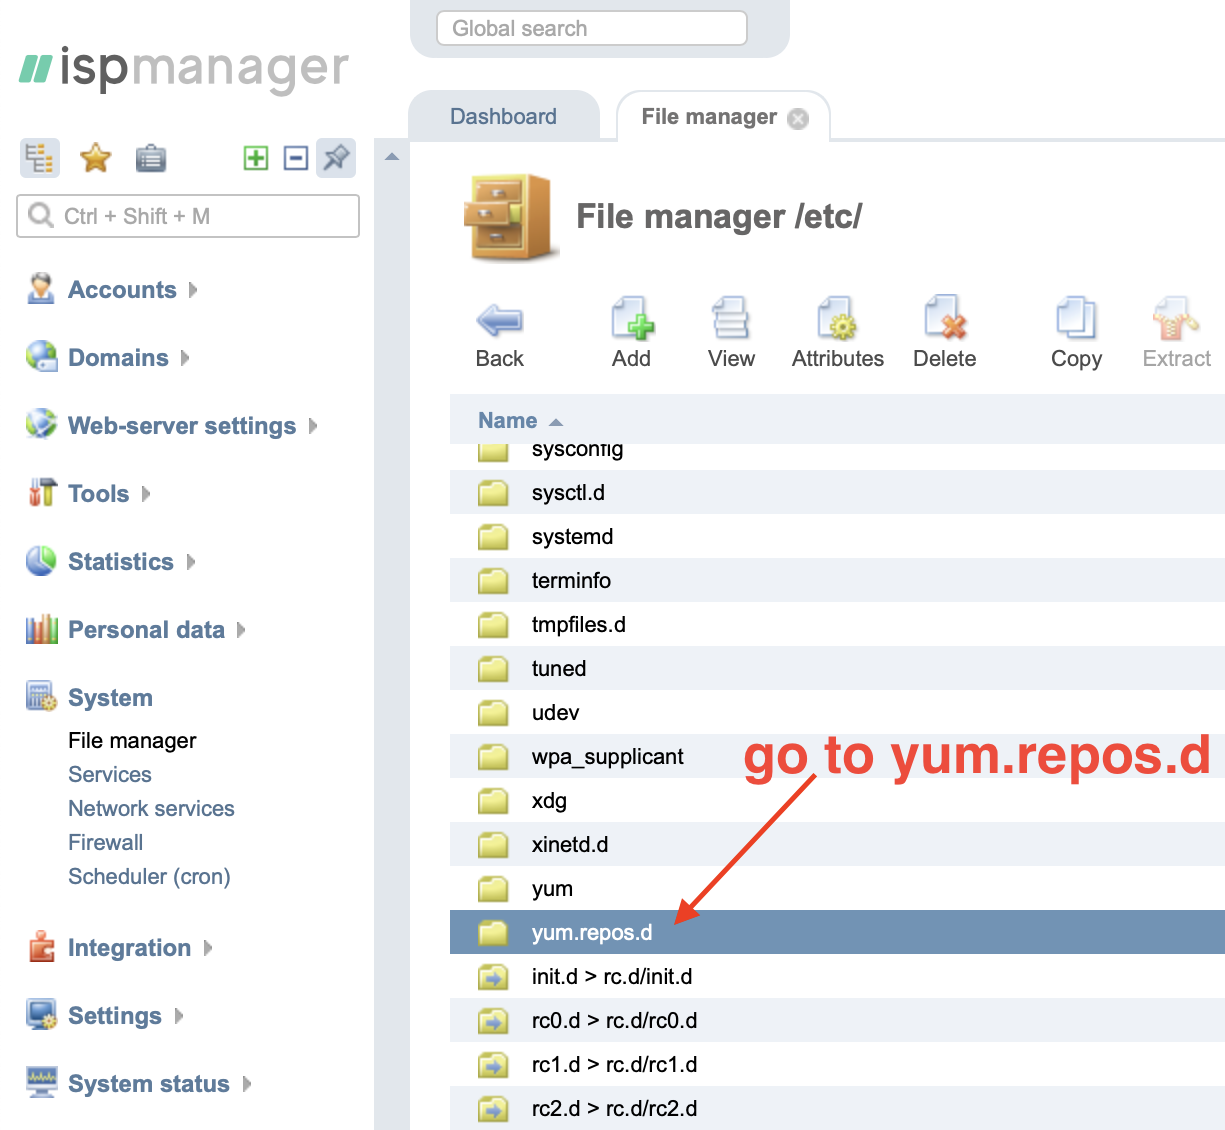
Open etc folder and scroll down to yum.repos.d folder, open it. Now we have to upload our Mariadb.repo file inside this folder.

After we closed the File manager; stay in your ISPManager and go to Settings; Features. You would need to install the following features:
-
MySQL server
-
MySQL management interface (phpMyAdmin)
-
FTP Server
Please install the features at the same order as our experts listing them.
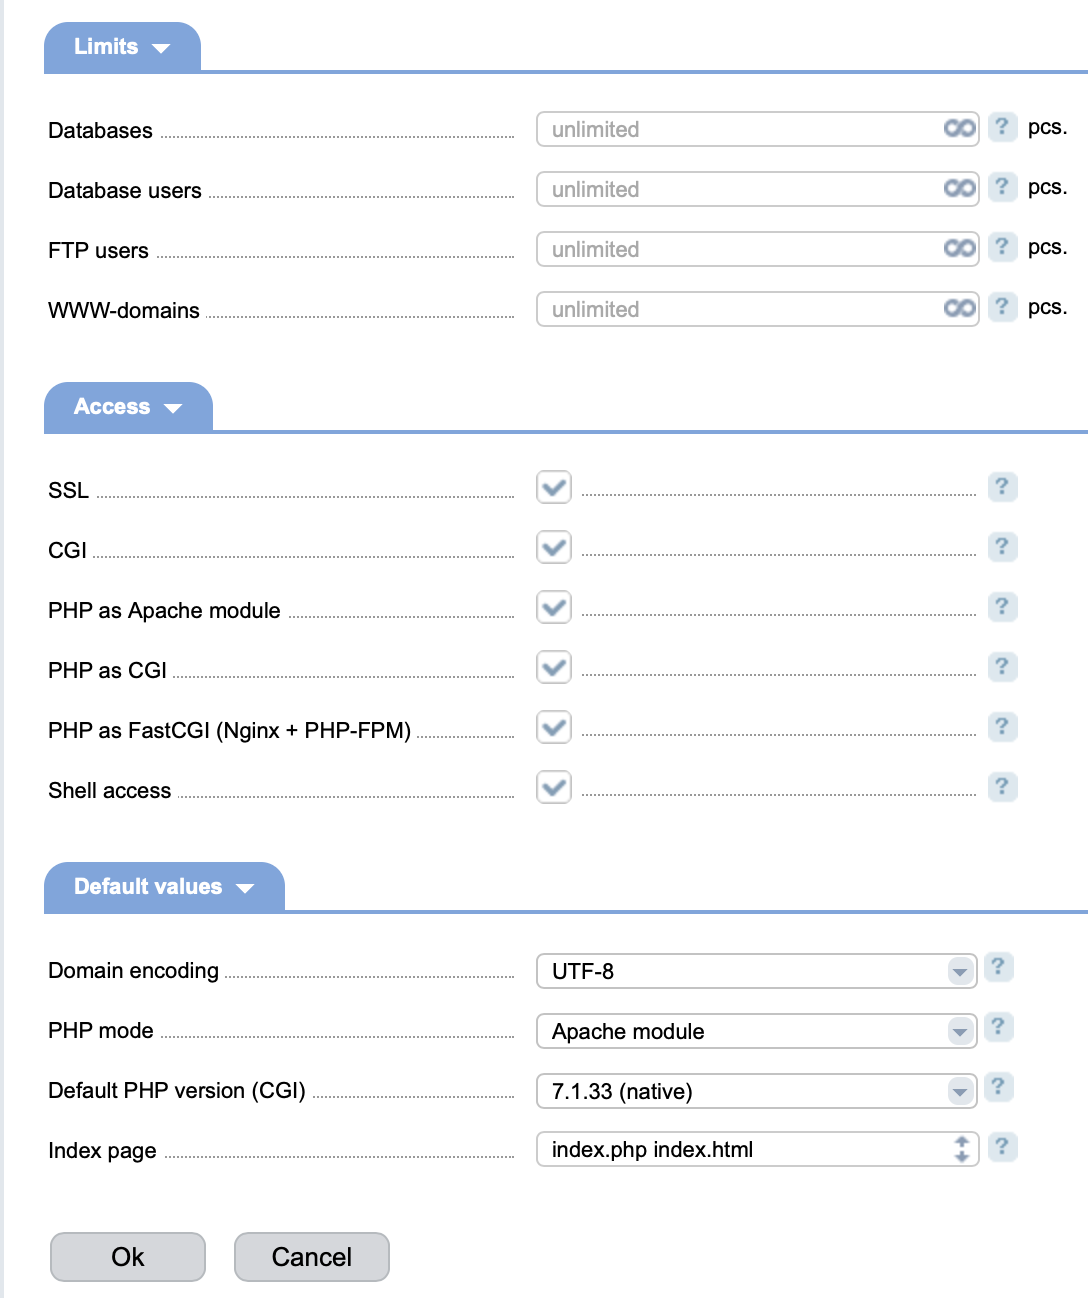
Please go to PHP; Settings; We would need to change memory limit to 1024 minimum. Press OK and close this tab.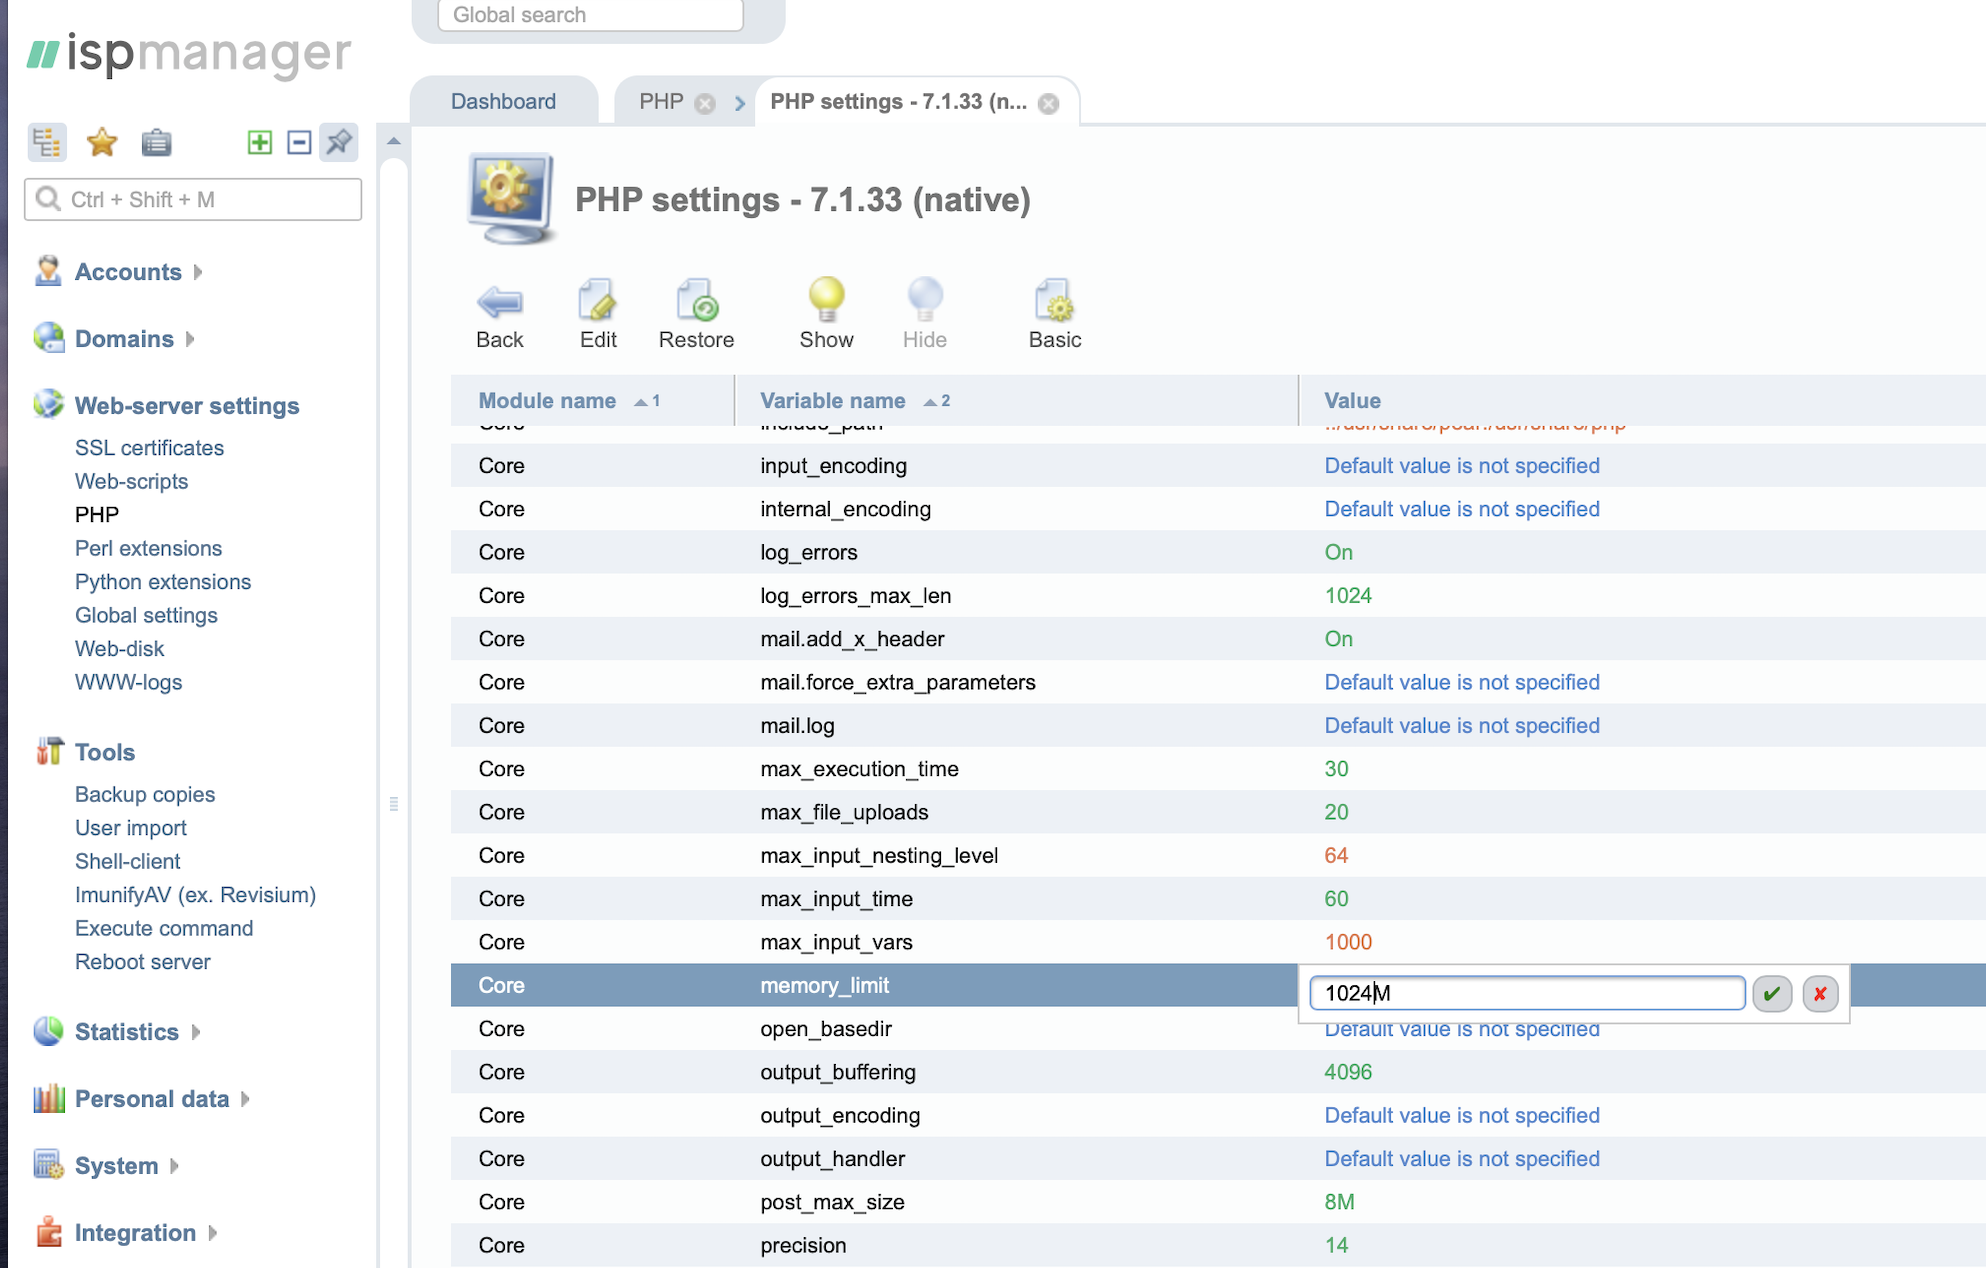
Now we would need to create a new user; In the same ISPManager panel go to Accounts; Users; and add a new user;
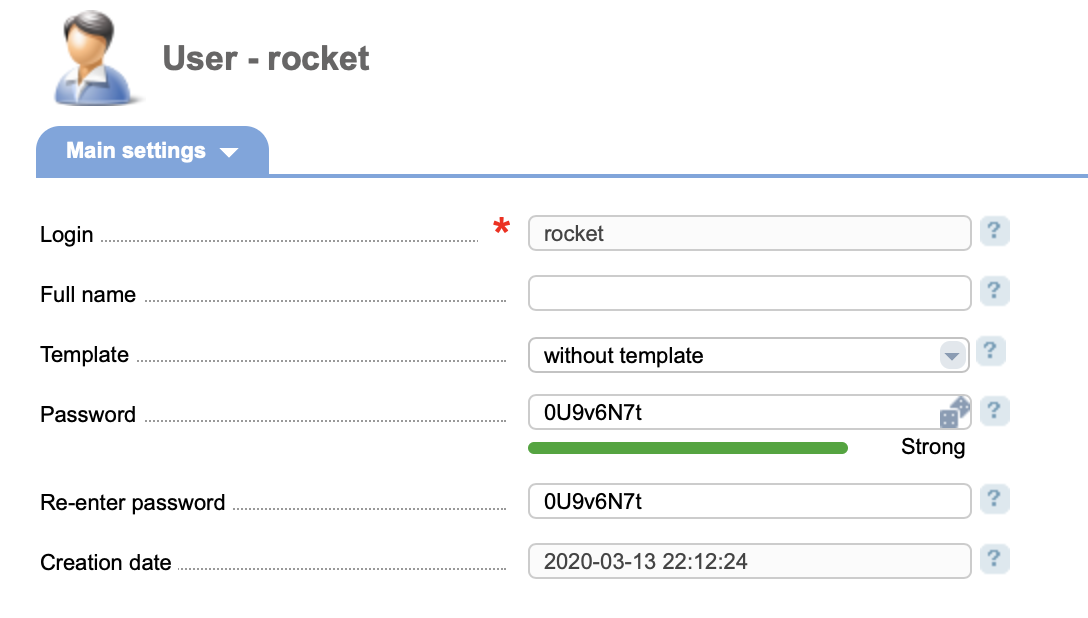
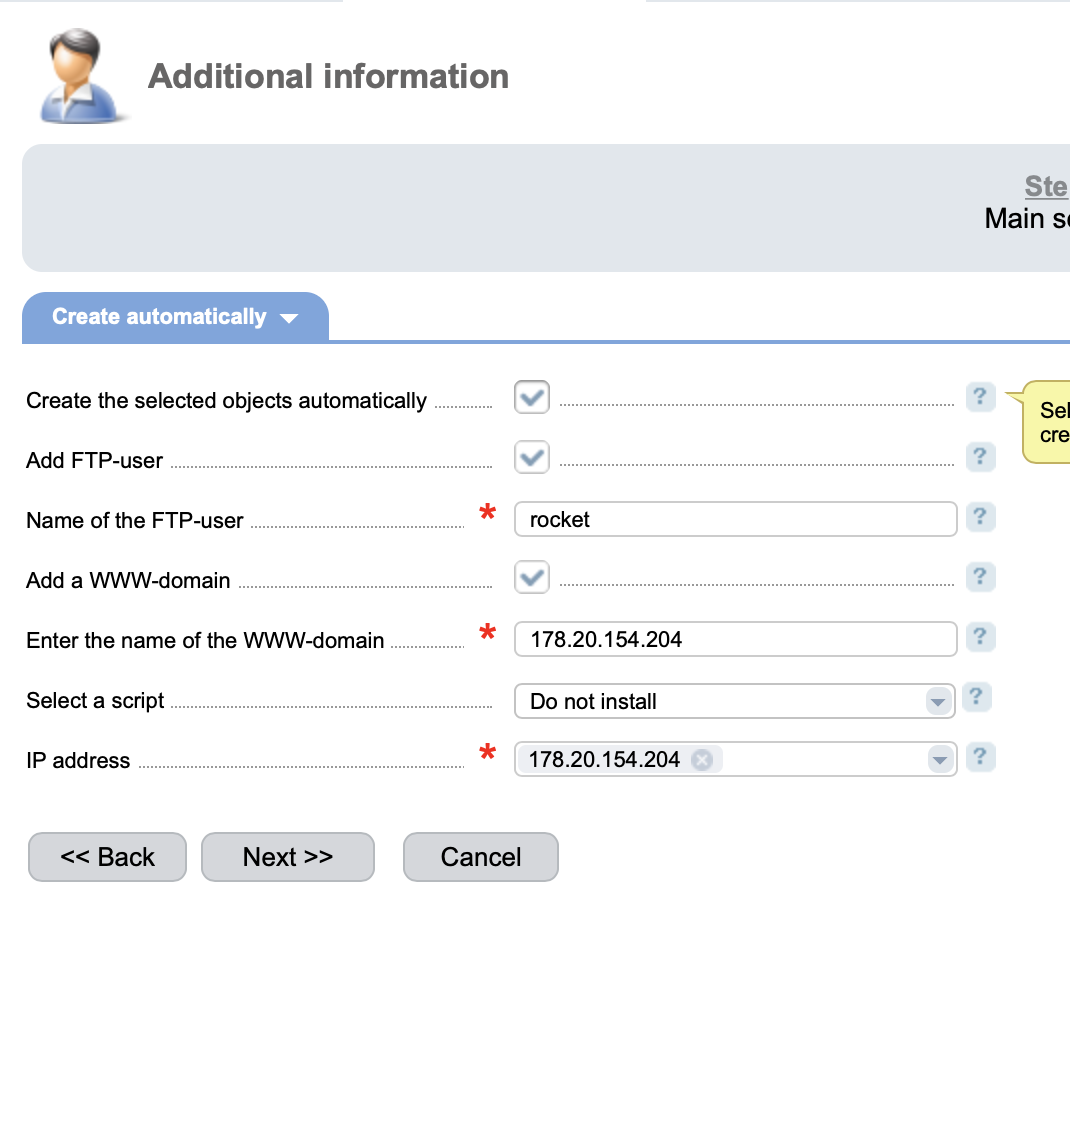
www-domain: put your IP or your paid domain name
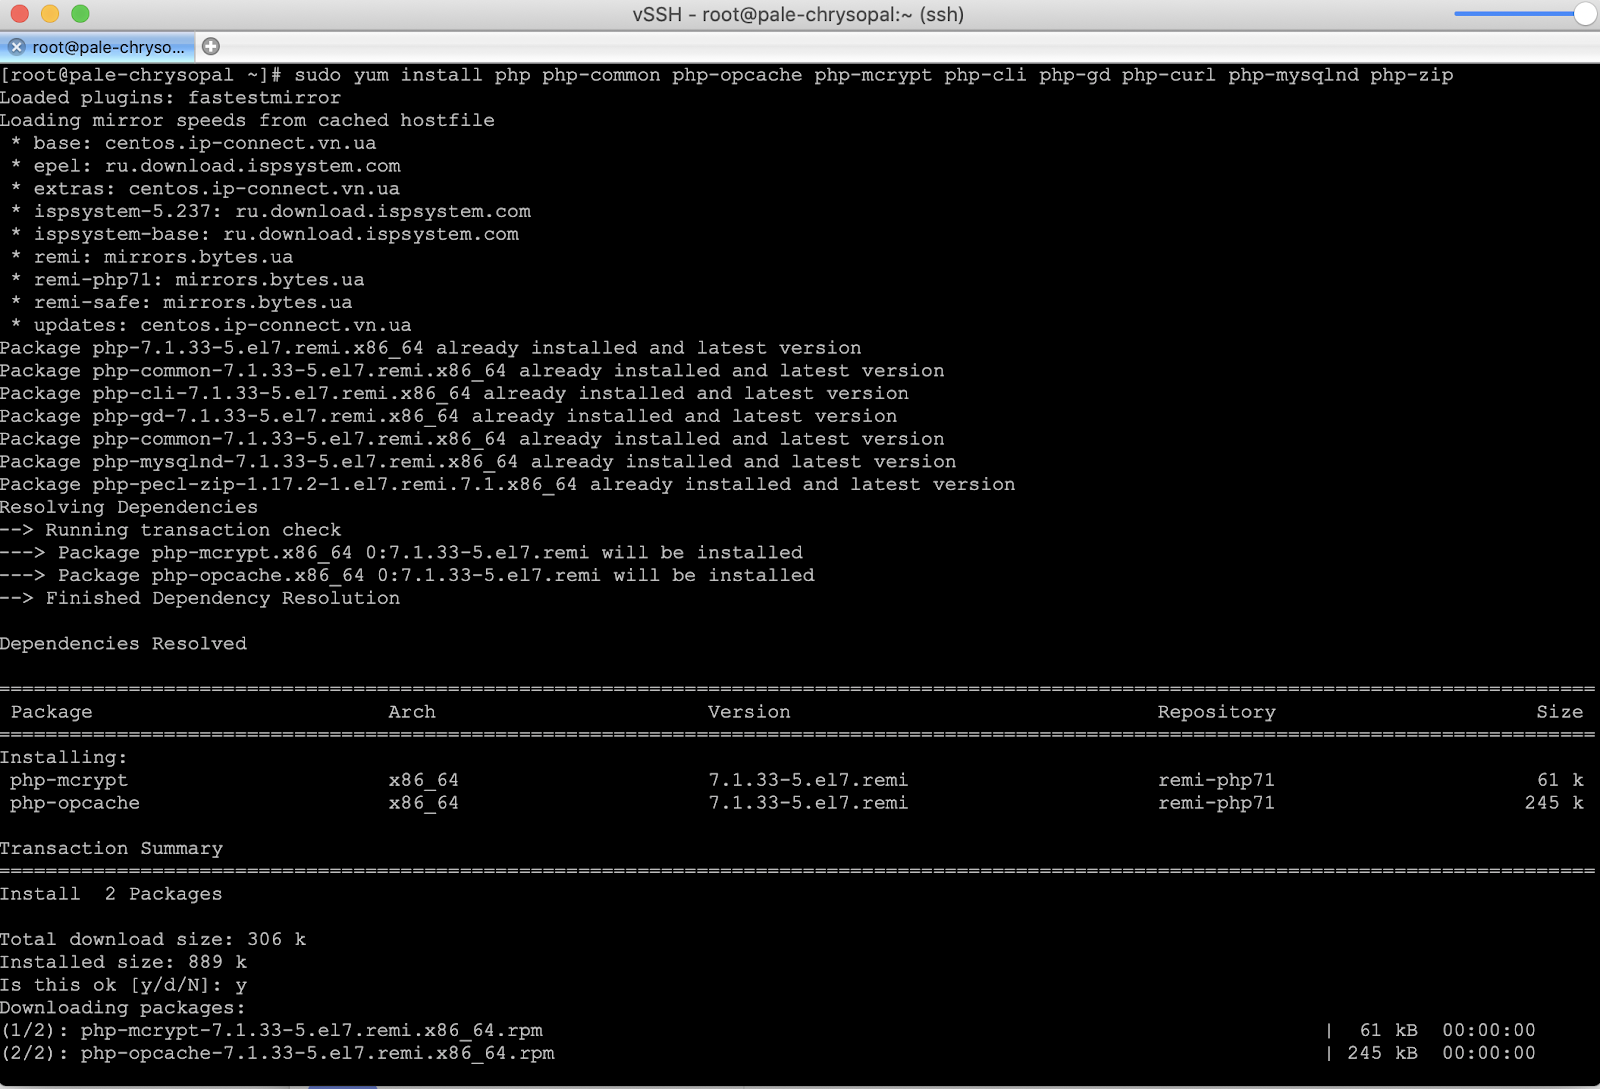
Now we have to open our SSH and connect to the server using our root user;
run this command:
sudo yum install php php-common php-opcache php-mcrypt php-cli php-gd php-curl php-mysqlnd php-zip
This will install the required PHP modules.
When the installation is finished, please go to your ISPManager panel and open Web-server settings; PHP; choose 7.1.33(native) version and go to Extensions;
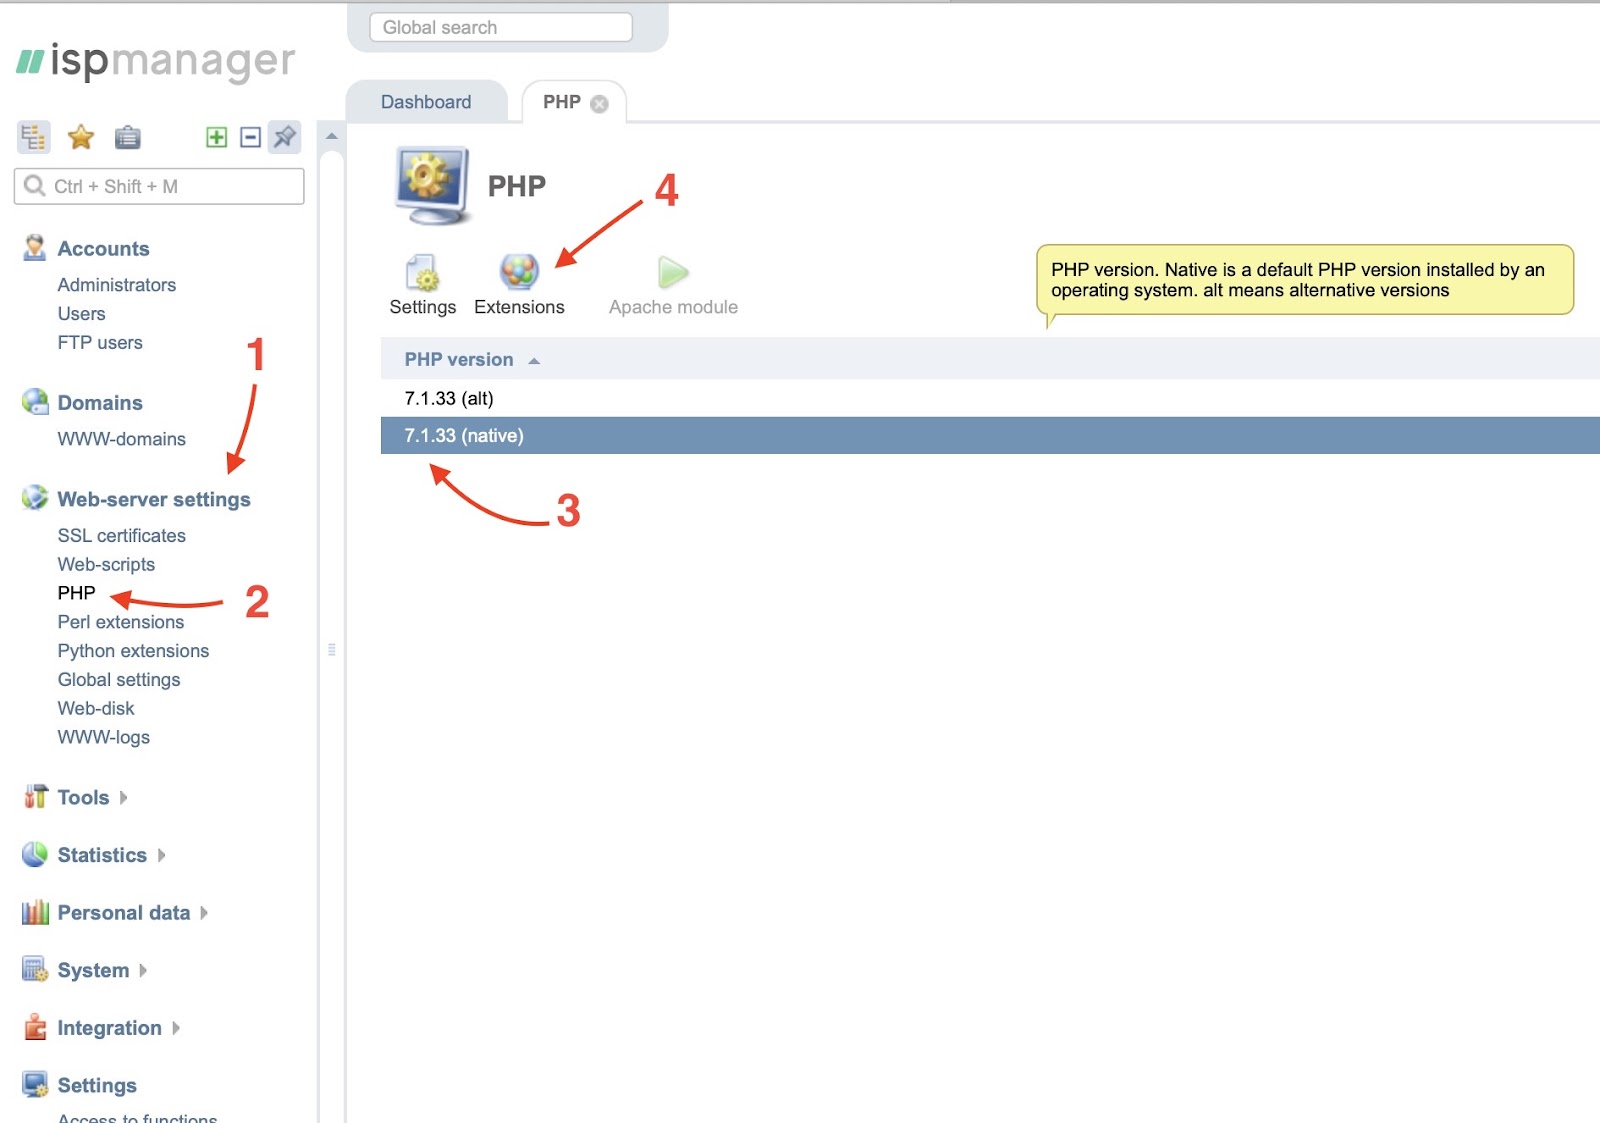
Inside the Extensions you would need to find “soap” extension; first install it, if it’s not enabled automatically, then you would need to enable it yourself.
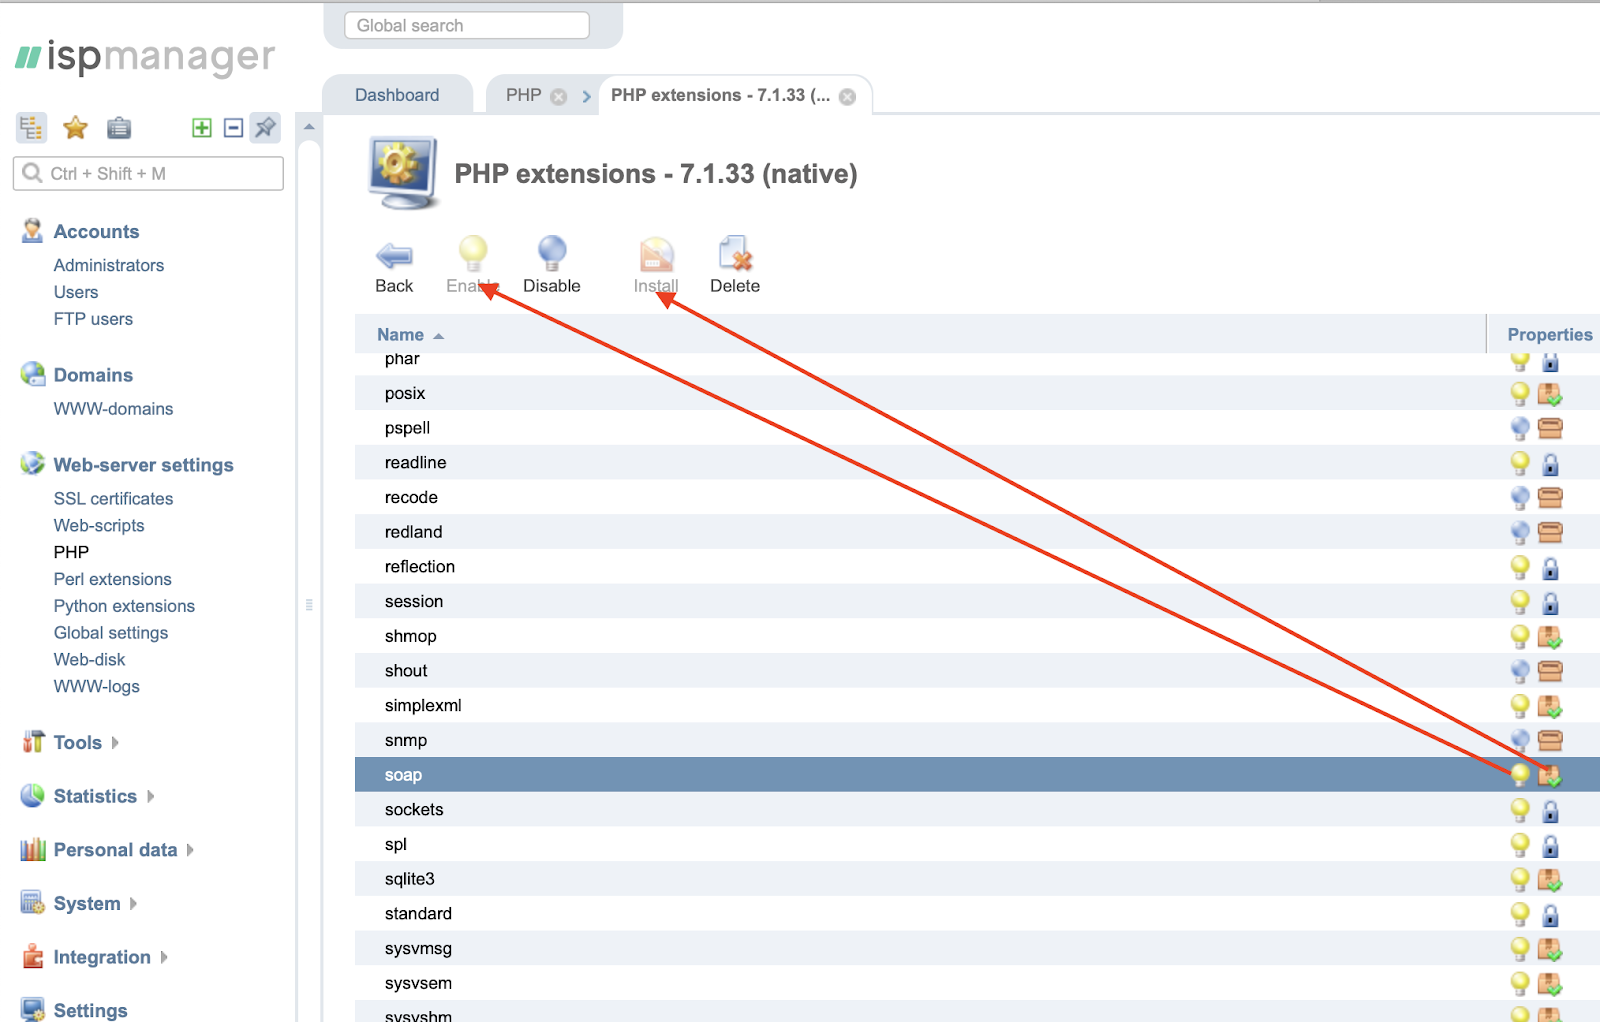
close this window.
Make sure that all the php system requirements are activated, at this specific case we know that for the Magento 2.2.7 version only “soap” extension not activated.
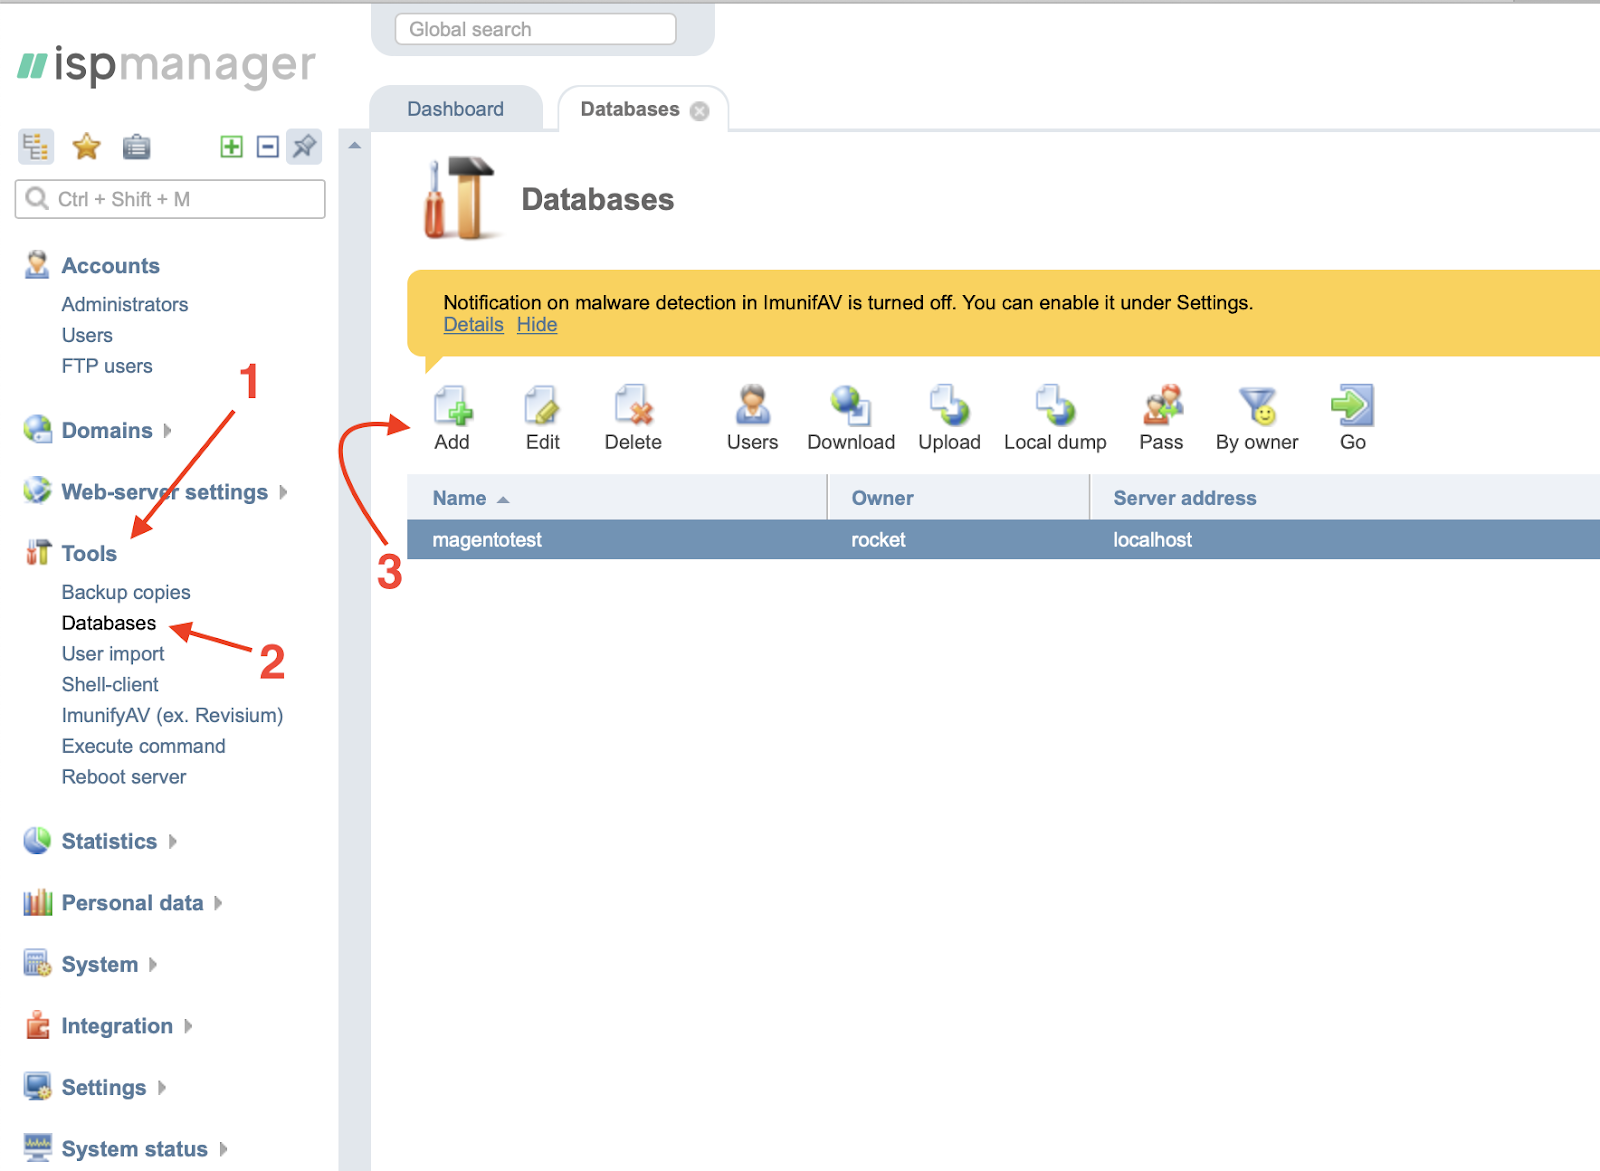
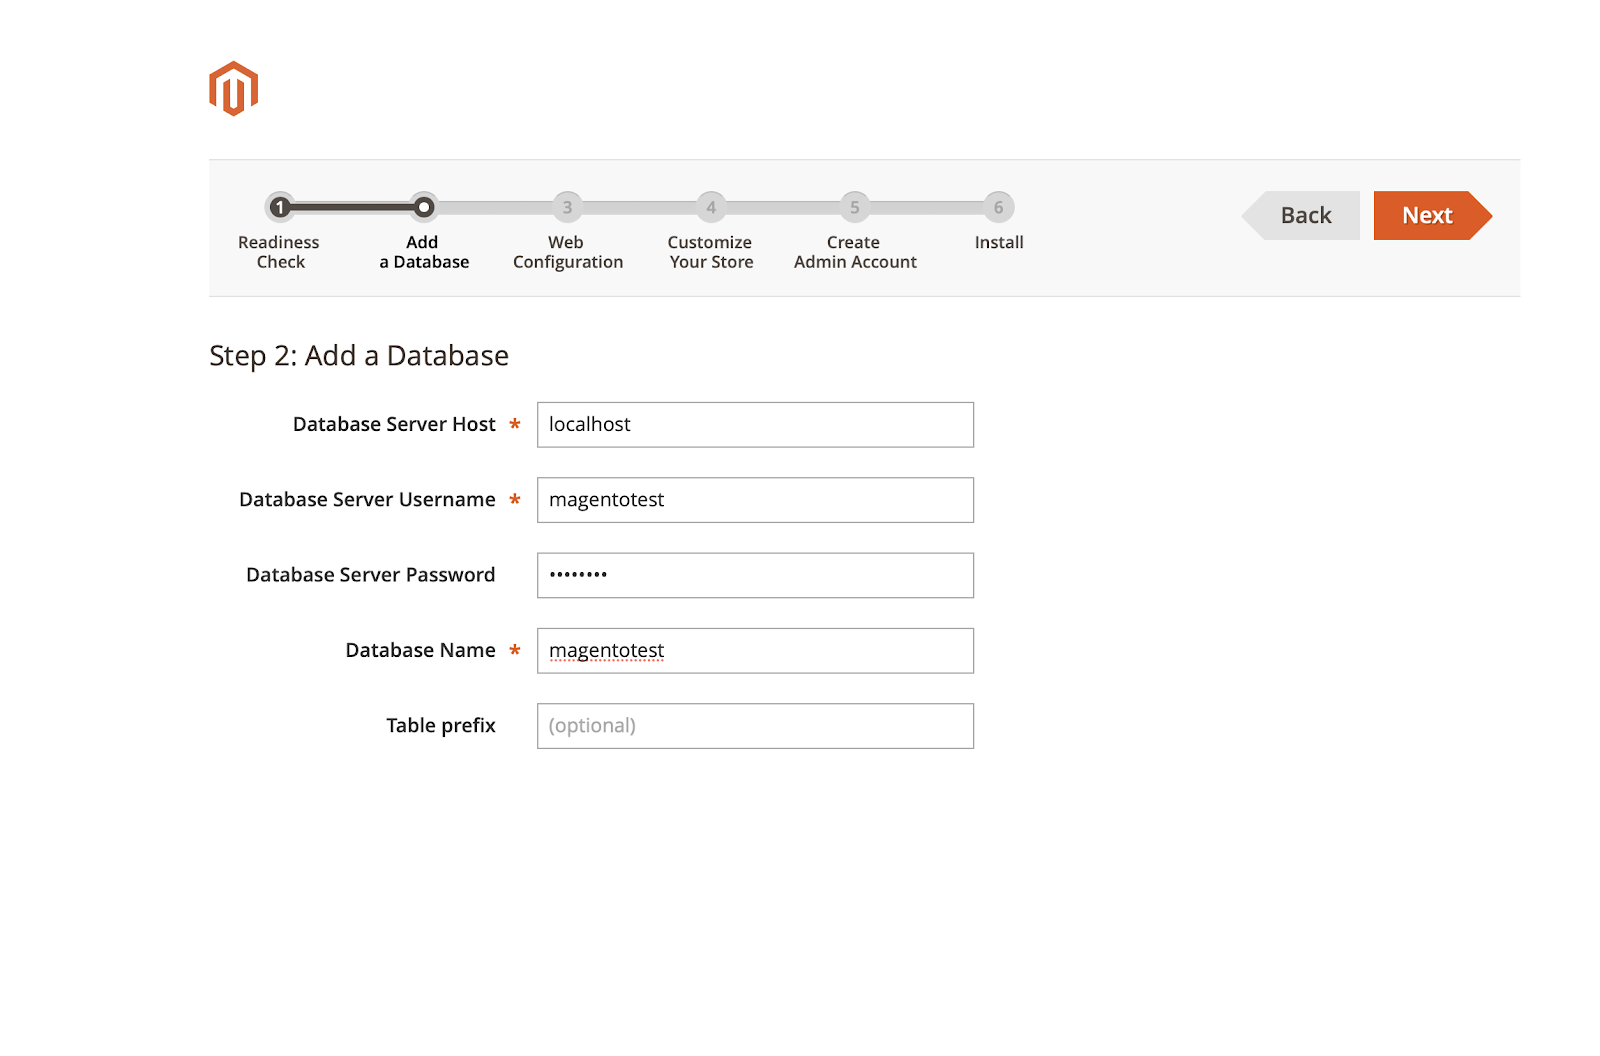
Now we would need to create our database, using the ISPManager panel.
Open your panel and go to Tools; Database; and create add new one. You would be asked to put the name for it, username and password.
Finally using FileZilla we can connect to our FTP server. Use your IP address and created through ISPManager user and password details to connect. Open WWW folder; you will see your website folder, in our case its named as our IP Address; Delete everything from this folder and upload Magento-CE-2 files.
If successfully uploaded all of the files to your FTP Server, it’s time to start the installation of Magento 2. But before we can start you would need to change php_admin_value open_basedir in the domain configuration, open your ISPManager panel and go to Domains; www-domains; choose the domain and press config. In apache configuration file change both php_admin_value open_basedir (number 22/28) to NONE.
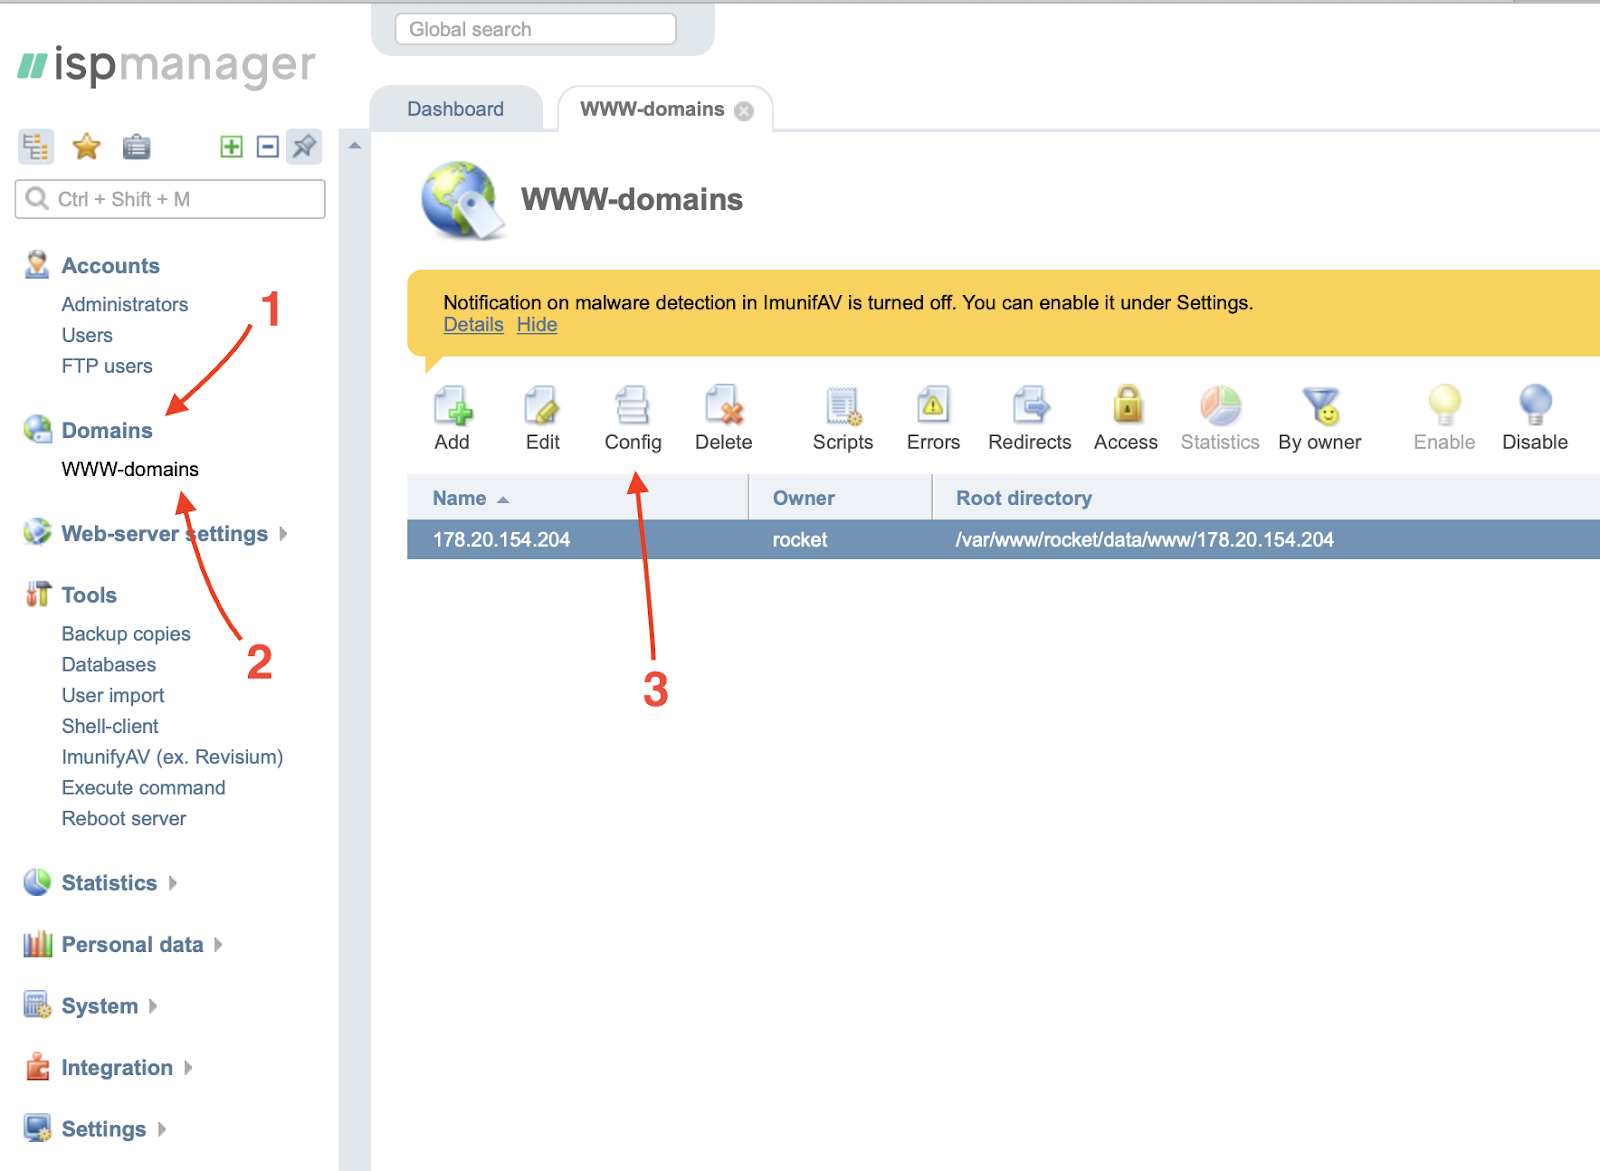
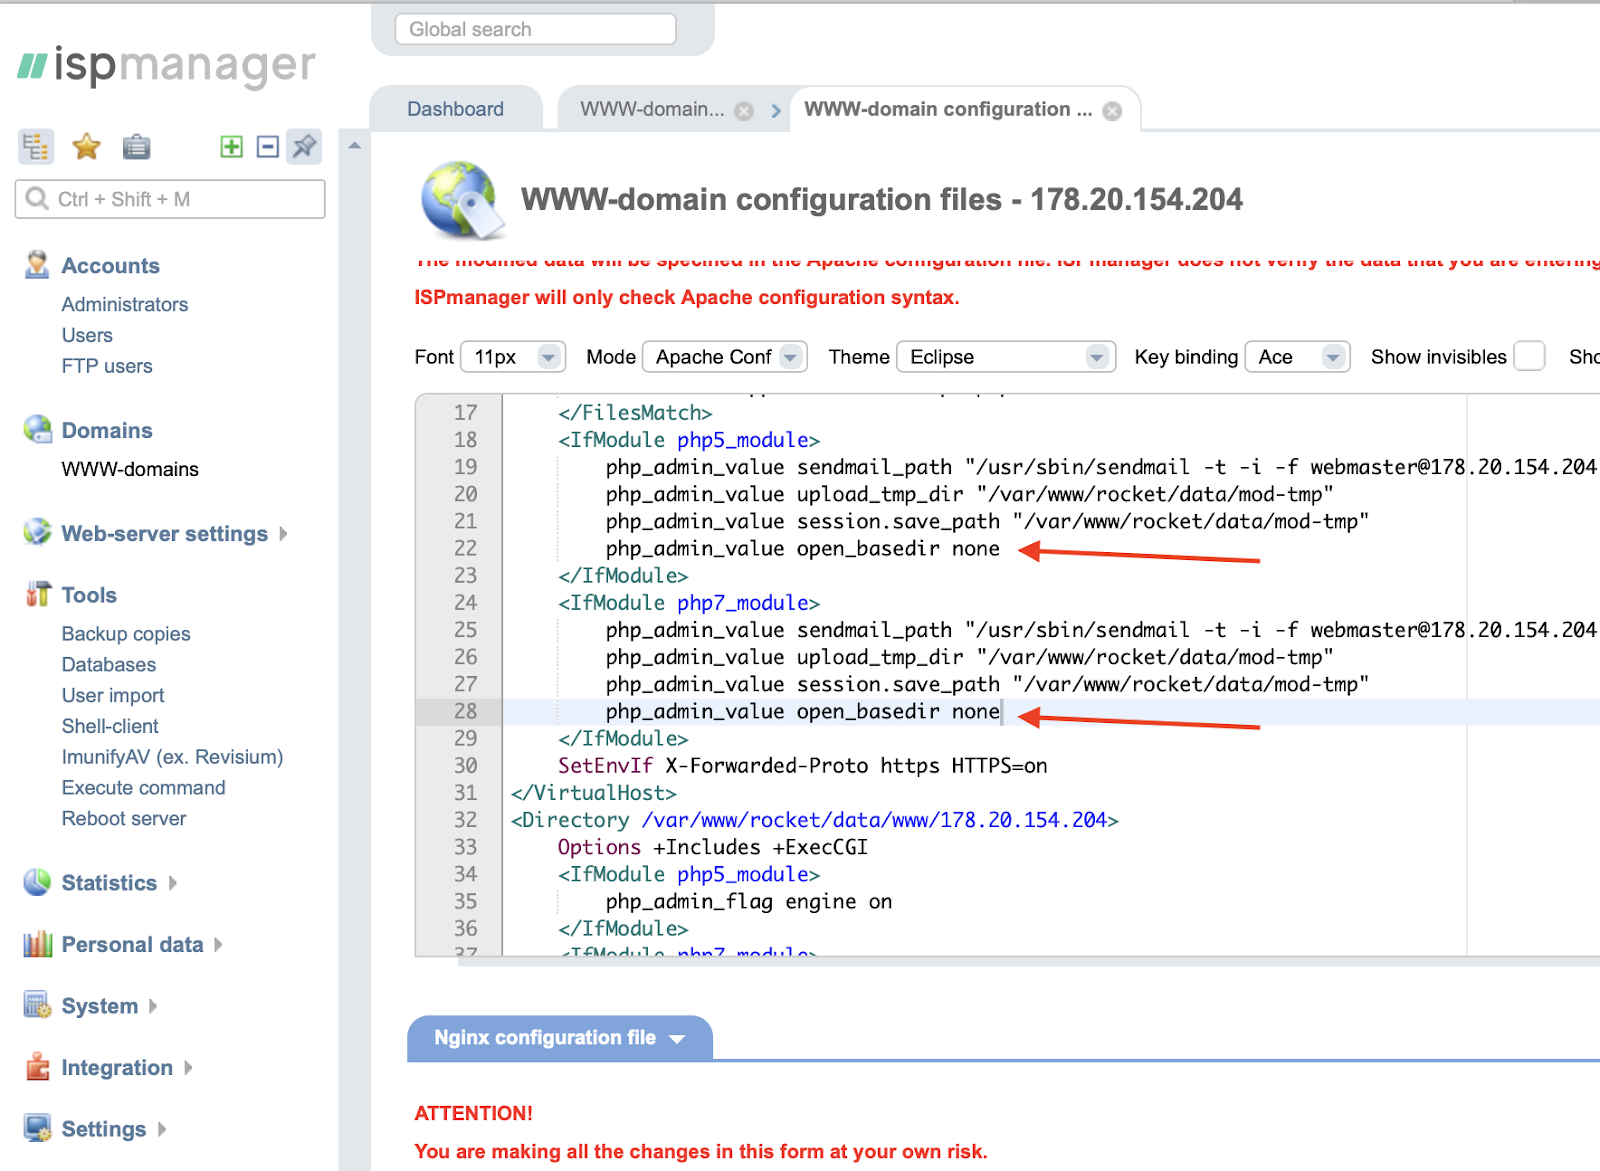
Press OK and exit.
Now simply open your browser and go to http://your-server-ip-address
If everything was done right you should see the installation screen:

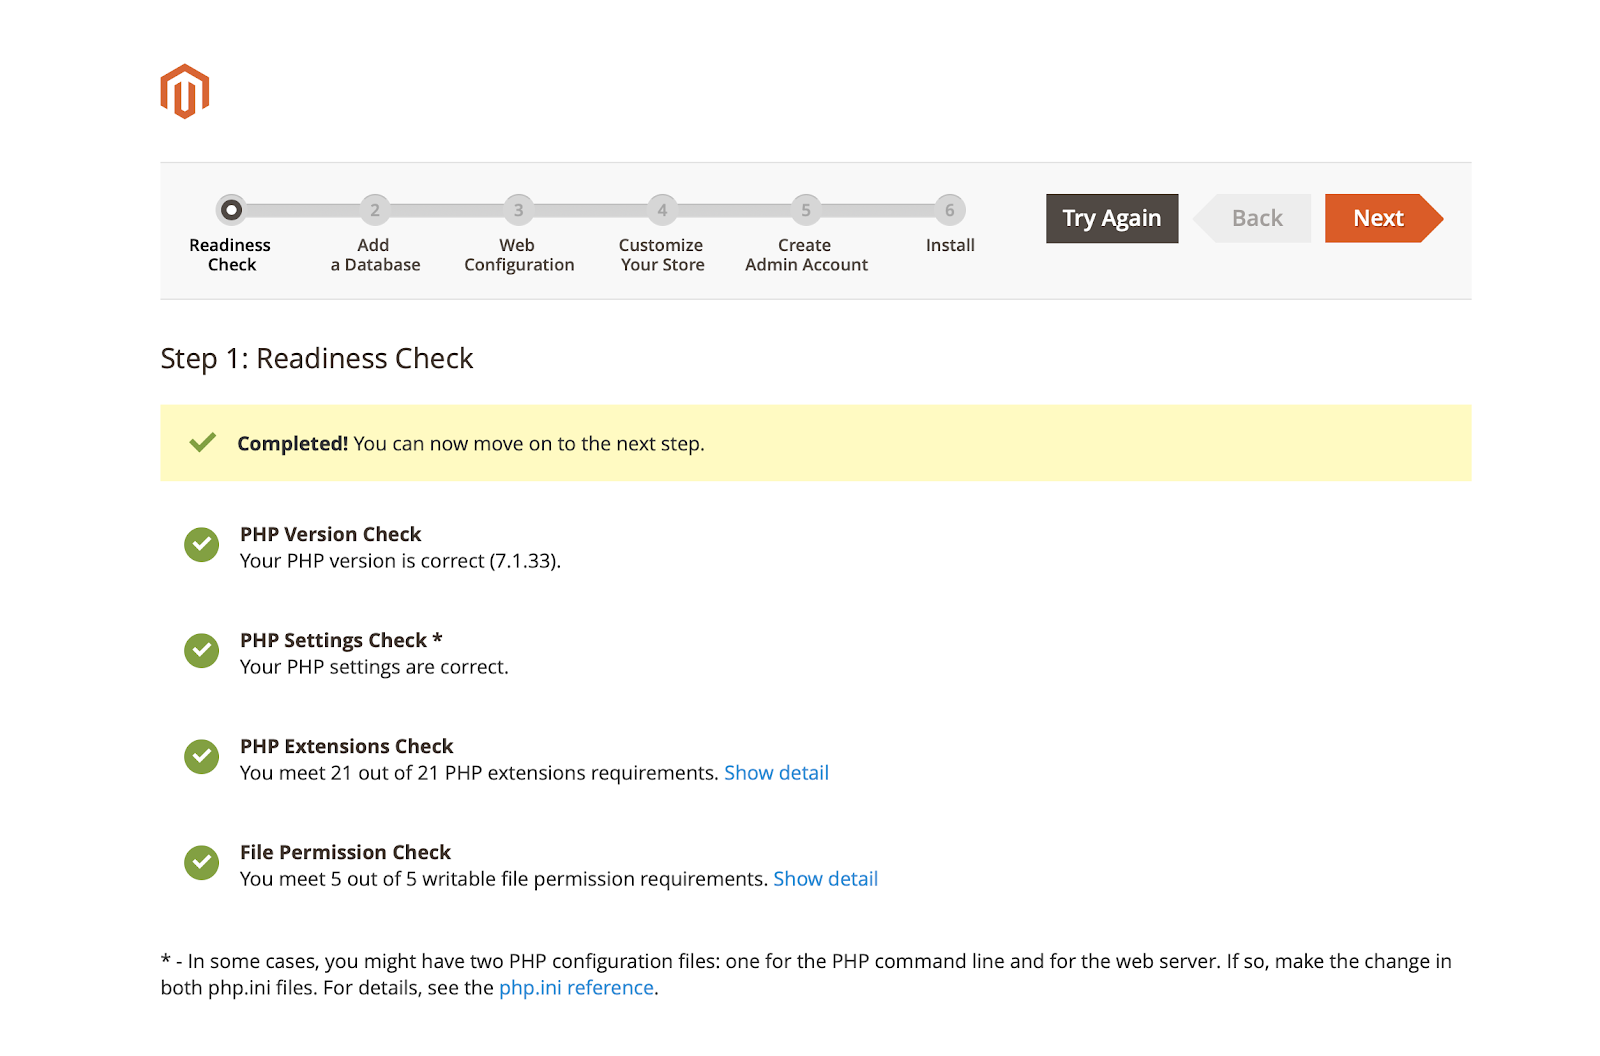
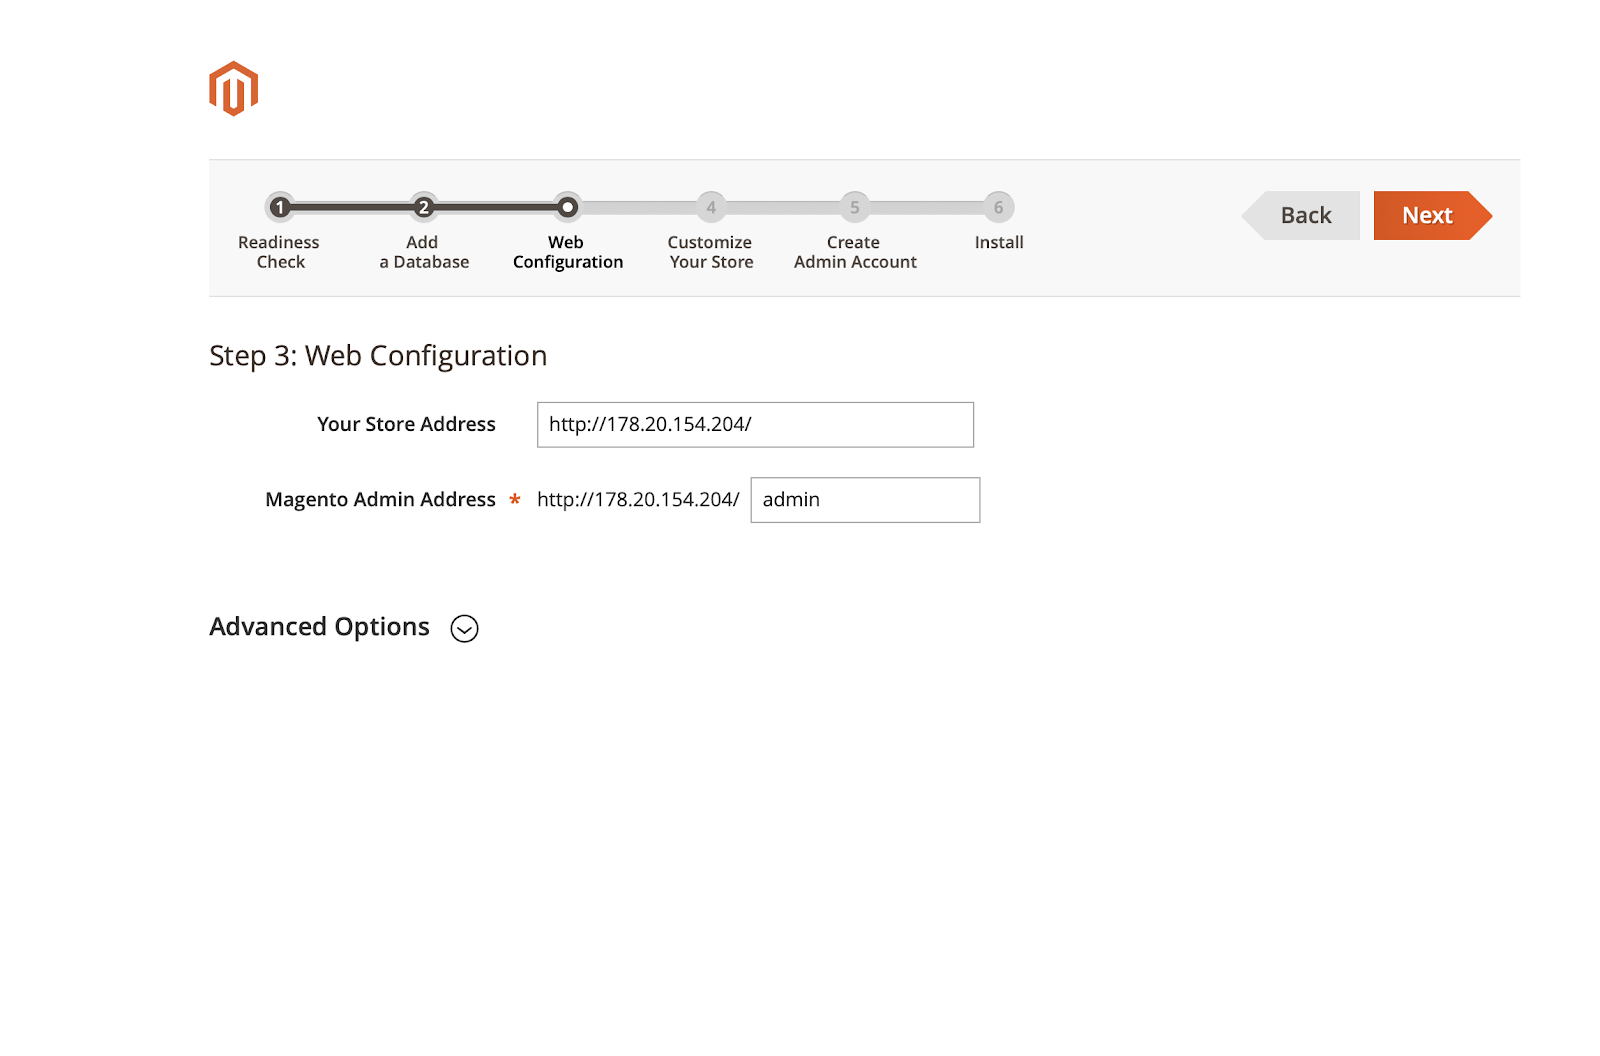
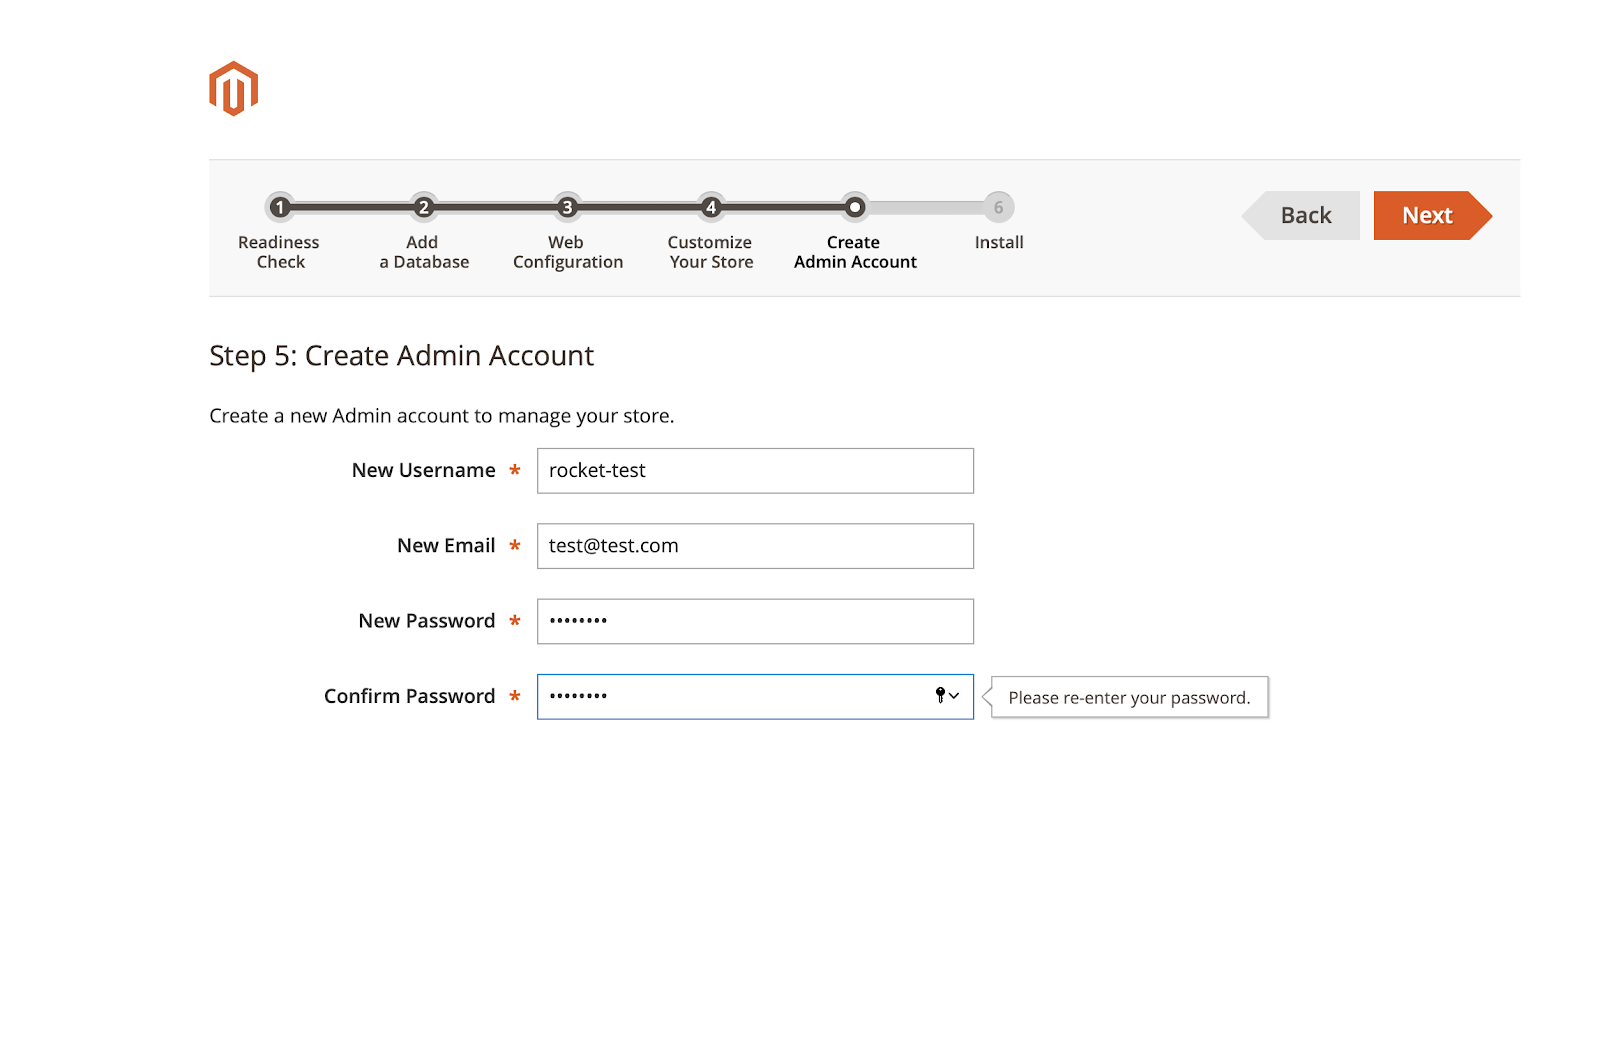
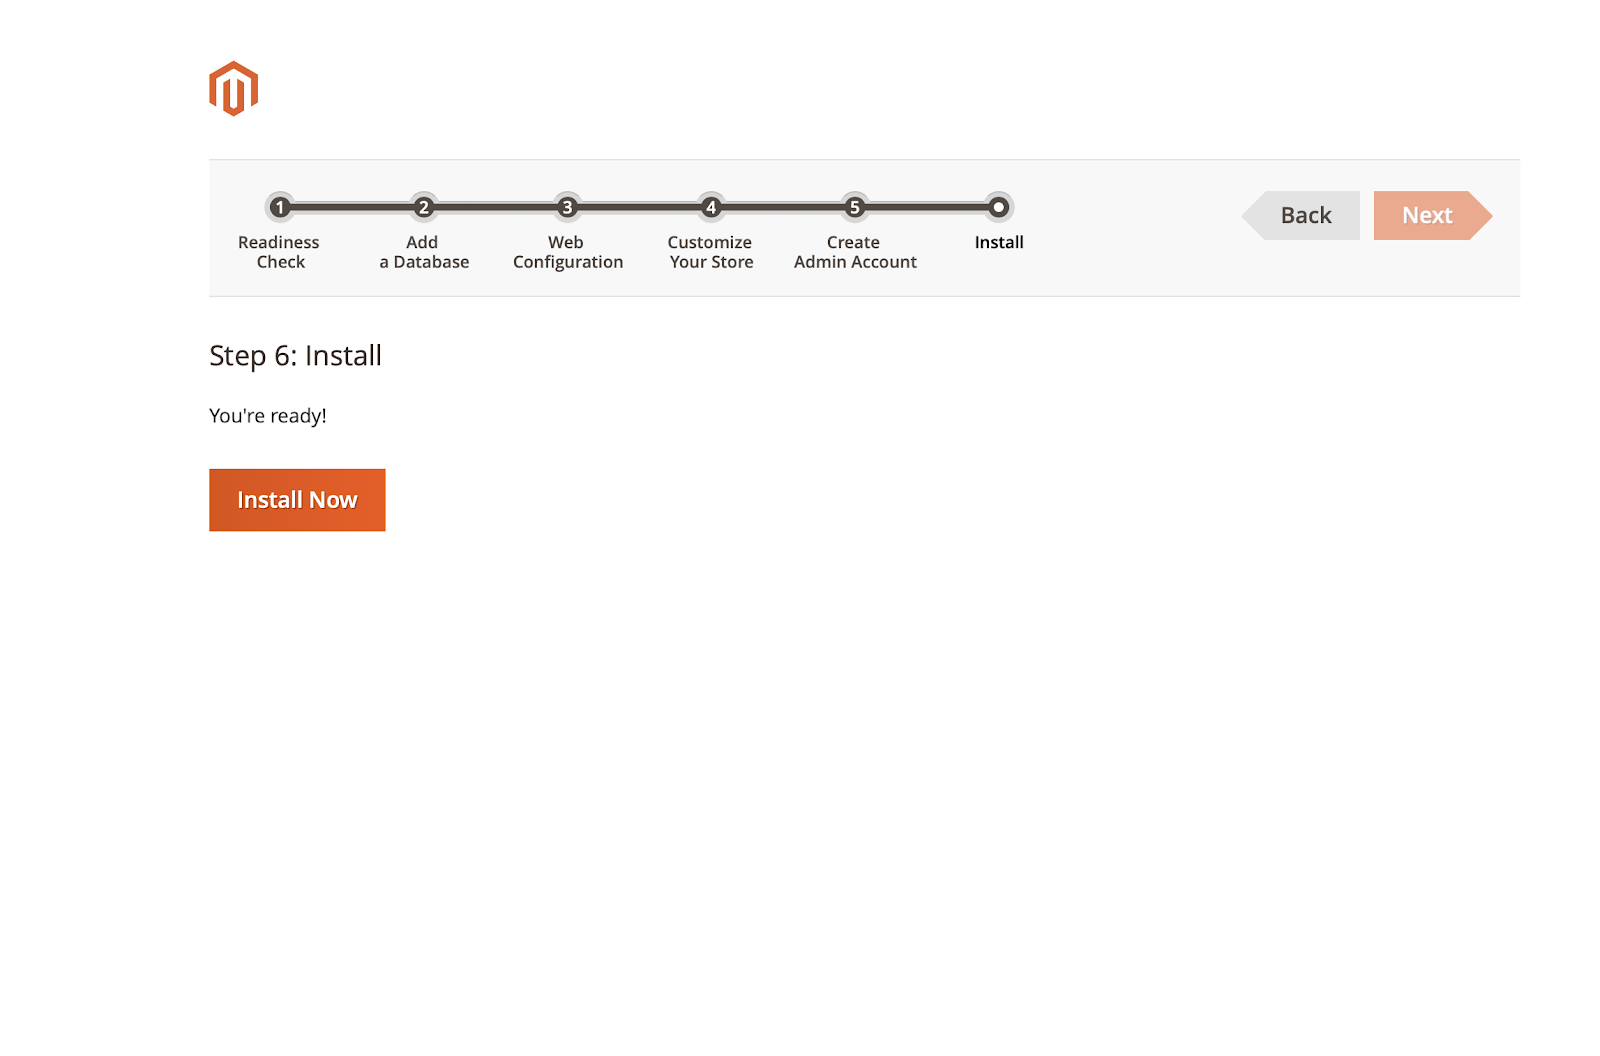
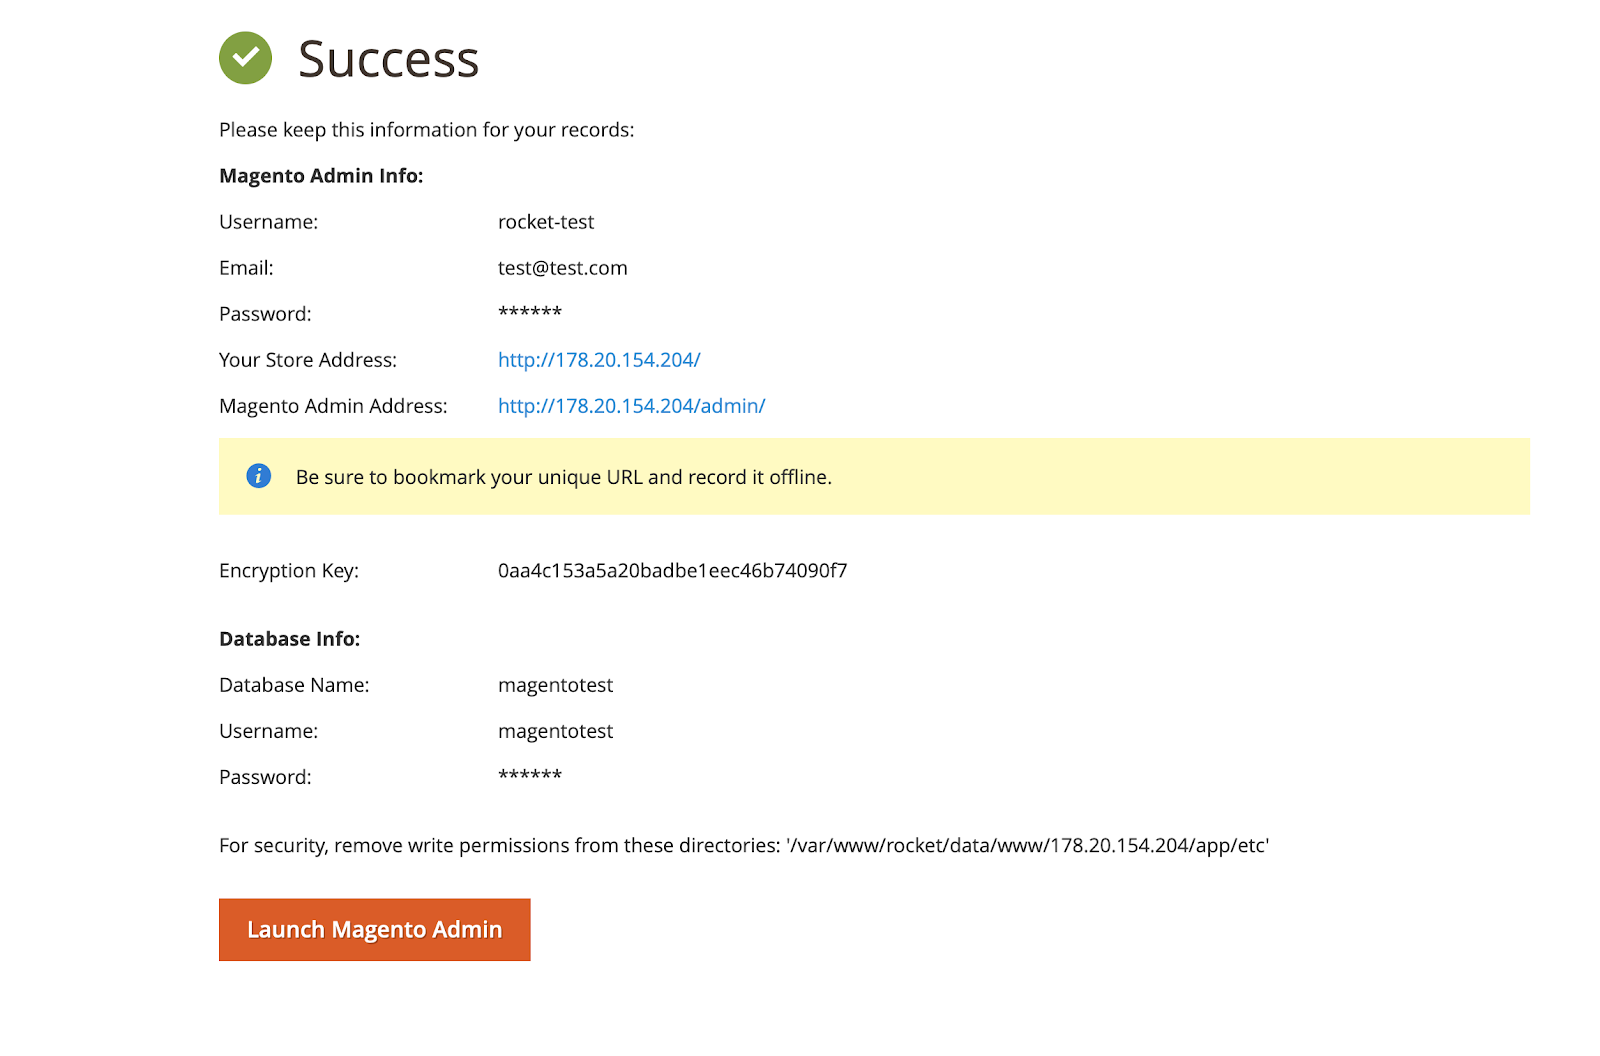
Congratulations, with the help of our Magento ecommerce agency we have successfully installed Magento 2 on Centos 7 server. Your standard Homepage should be available at http://your-server-ip-address and you can log on to your admin panel through http://your-server-ip-address/admin.

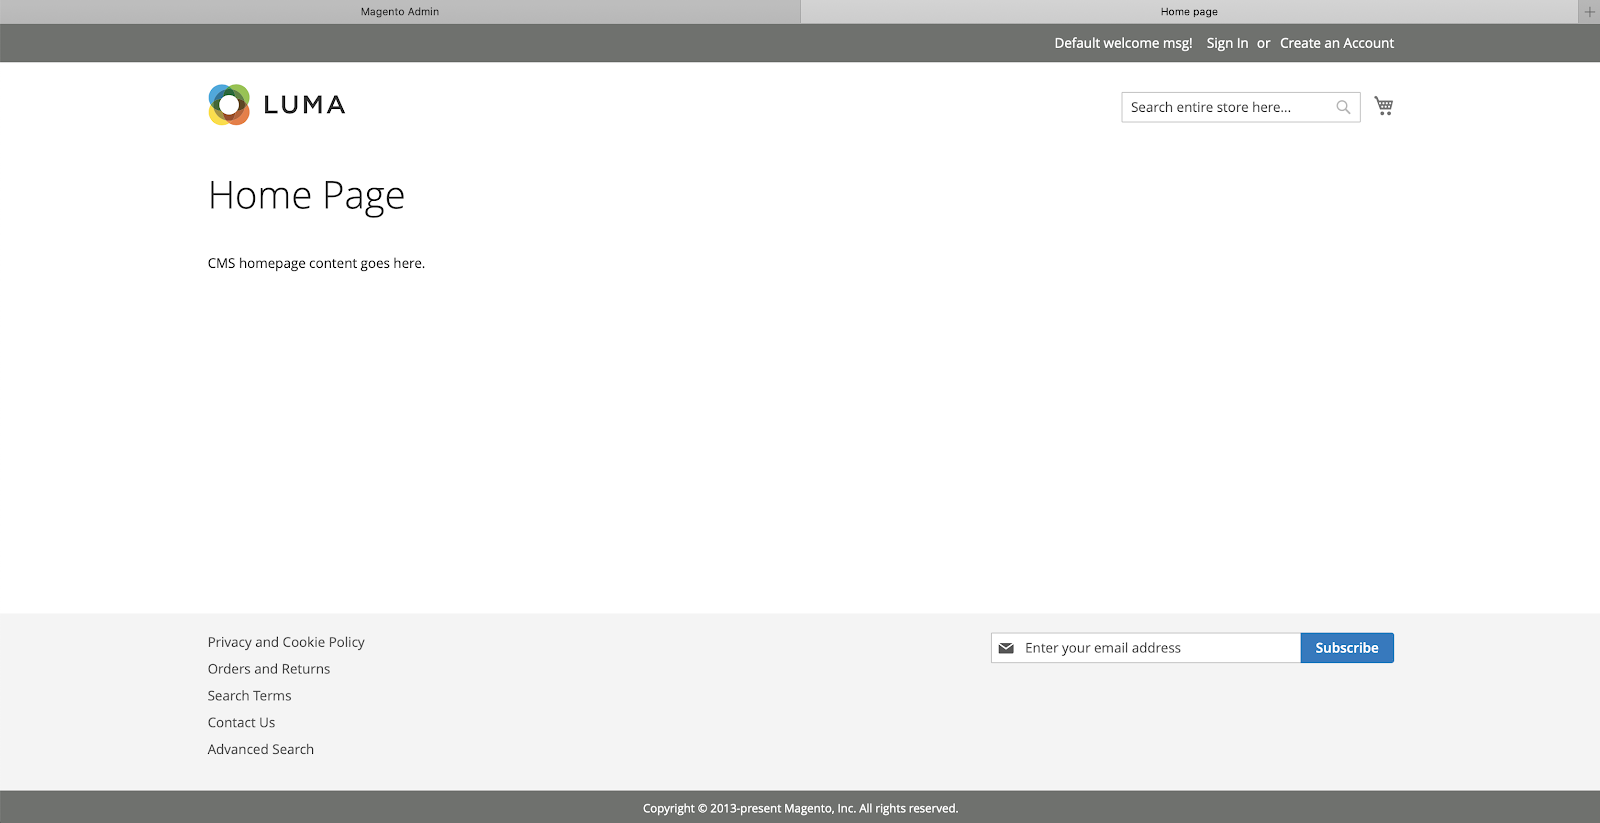
We hope with the help of our article you have managed to install Magento 2 on your VPS server.
This is just the basic installation, to create a professional online store further technical and additional functionality configuration is needed, caching and speed optimisation are also required.
Looking for a Magento eCommerce Agency in London (UK) - please do not hesitate to get in touch with us, Rocket Website Agency Ltd will take care of your project in best possible manner.
Thanks a lot!
Author

rocket
Comments (0)